
Linux Lab & Walkthrough for Beginners
This post will cover: building a Virtual Machine, installing Ubuntu Server, a few basic Linux commands, and putting together a simple bash script.

One of my friends is making a career change to Cybersecurity (shout out Jonathan) and is looking to get more experience with Linux. I ended up putting together a lab/walkthrough that covers everything needed to start a Linux lab at home for practice. I figured this may be helpful for anyone else looking to get started. If you’re brand new, it may sound like a lot but don’t be intimidated; I tried to include plenty of screenshots and external links to explain more about what’s being done.
This walkthrough will cover creating a Virtual Machine (VM) with VirtualBox, installing Ubuntu Server (Linux), and performing a few actions inside of the Linux CLI (Command Line Interface).
Note: Leave a comment if you have any questions or need help troubleshooting any issues.
Download & Install VirtualBox
First step, we need to download and install a VM Hypervisor to be able to create our Linux (Ubuntu) VM. There are many different options out there (including in the cloud) but to keep things simple and free - we will be using VirtualBox.
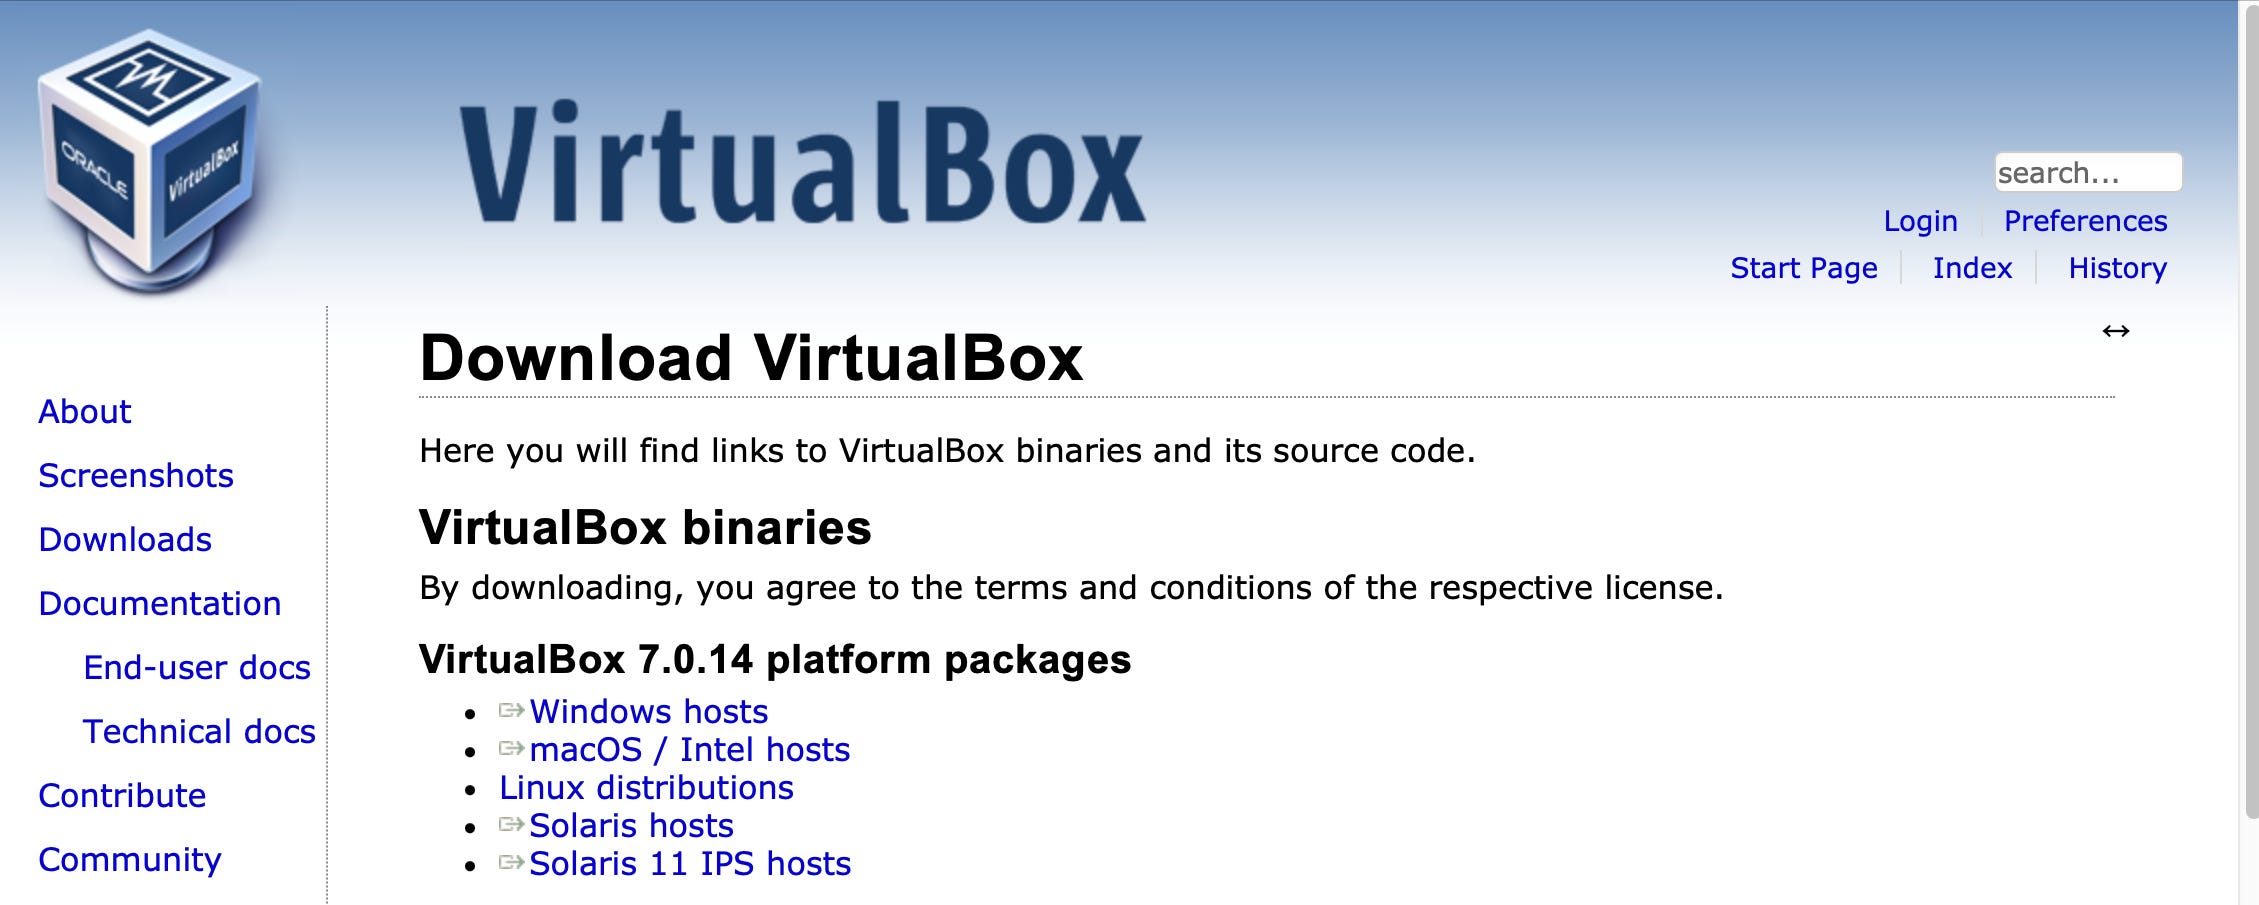
Navigate to this link and download the version for the Operating System that you have (Windows/macOS). You should be presented with a similar page in the screenshot below.
https://www.virtualbox.org/wiki/Downloads
Once downloaded, click through the installation steps to complete the install. Default installation will be sufficient for the purposes of this lab.
Download Ubuntu Server
Now in order to create a Linux VM, we need a Linux image to be installed. There are many different “flavors” (distributions) of Linux, for this walkthrough we will be going with Ubuntu Server. The LTS (Long-Term Support) versions of Ubuntu are stable, widely used, and free(!!).
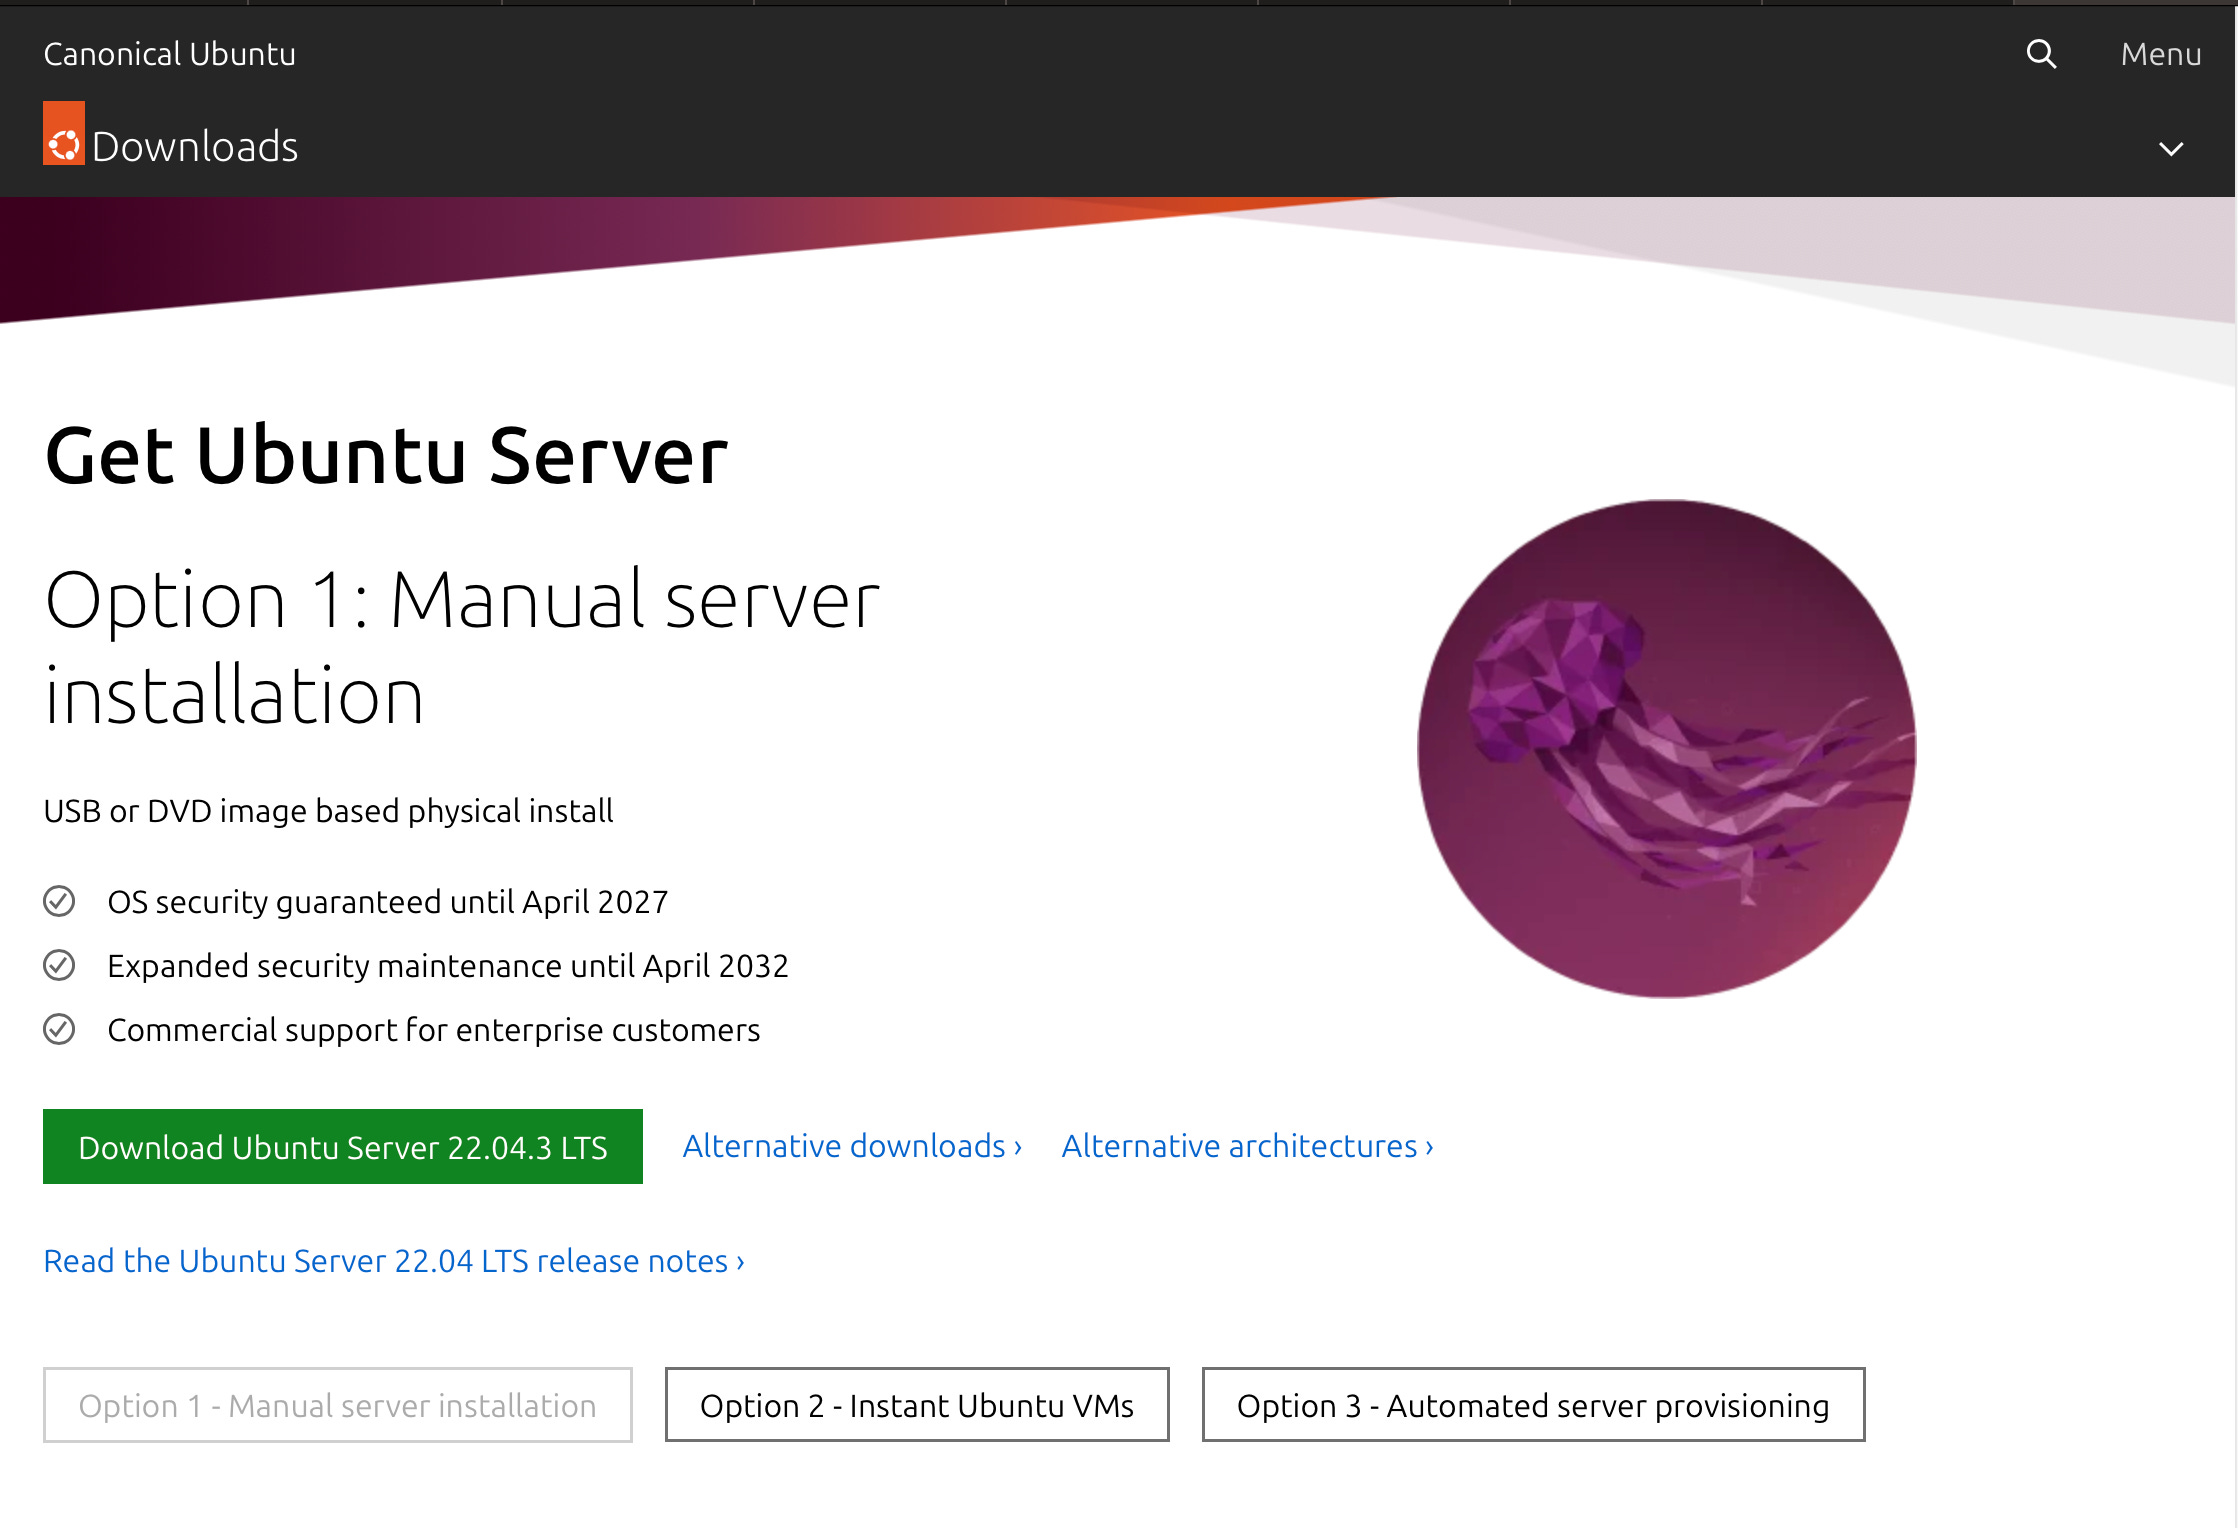
Navigate to this link to download the most recent stable release - which at the time of this writing is 22.04.3 LTS. See screenshot below for reference. Note: The download should be in the .iso format.
https://ubuntu.com/download/server
Create Ubuntu VM
At this point, we have everything we need to create the VM. Follow the steps below:
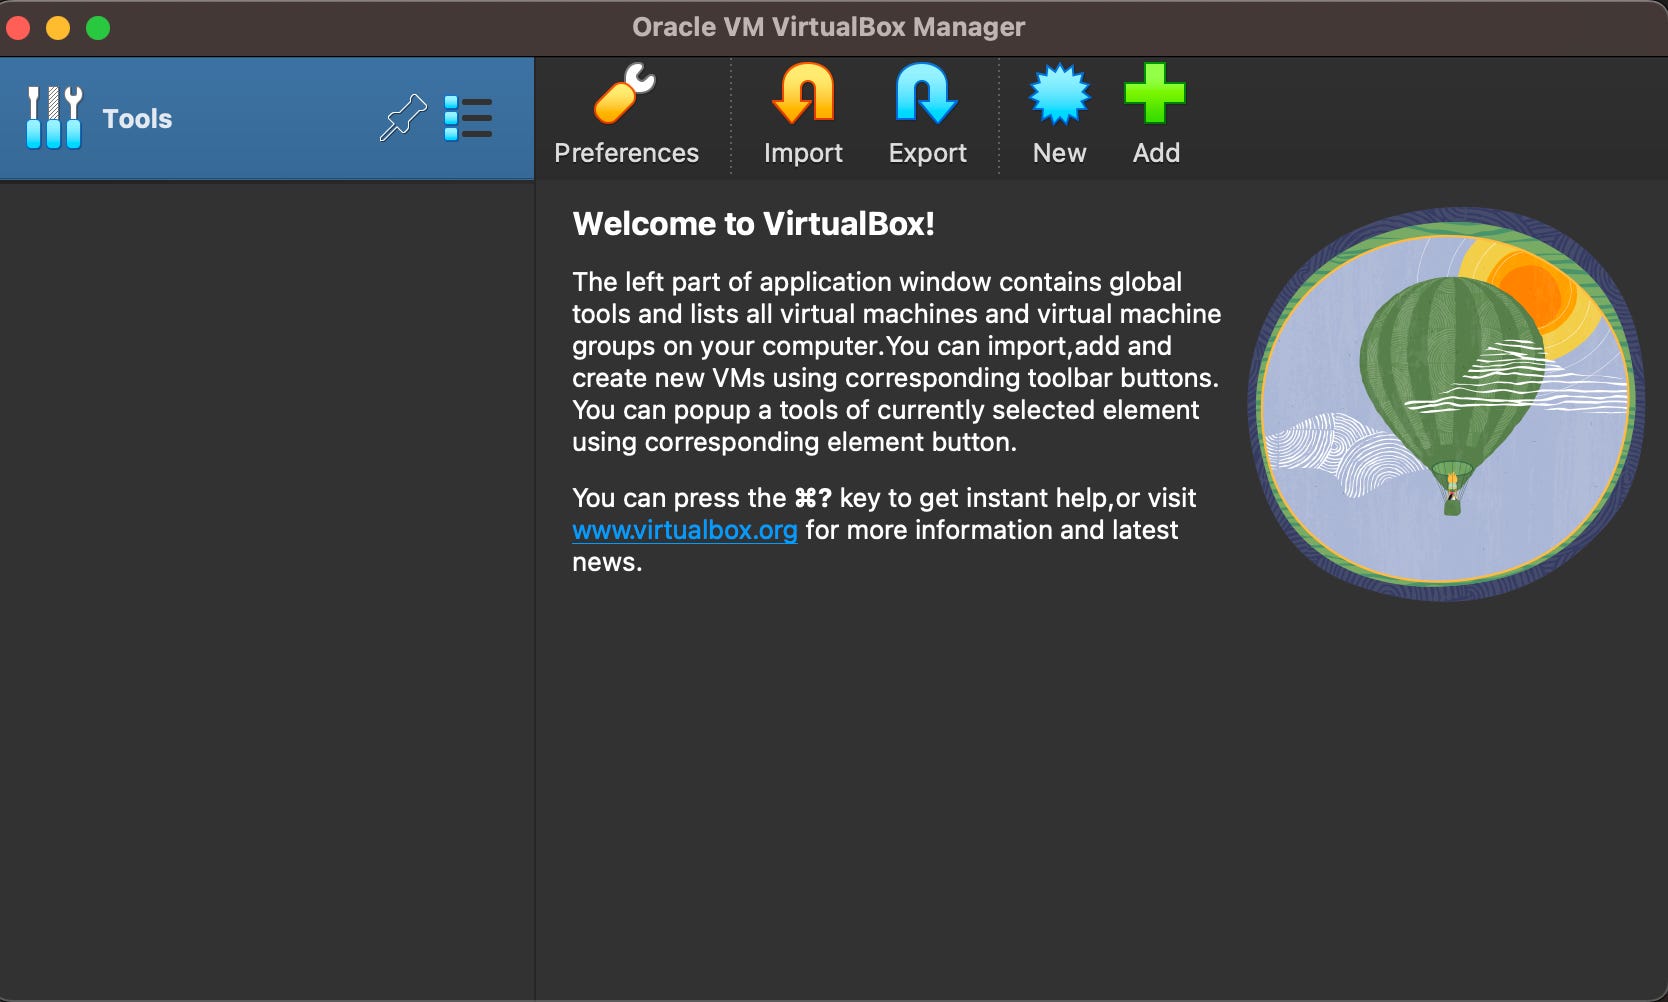
Open the VirtualBox application. You should see the main window like this:
2. Click “New”. A “Create Virtual Machine” window should pop-up.
3. For “Name”, we’ll enter “Ubuntu”. “Folder” can remain the default. Under “ISO Image” select the Ubuntu Server .iso file that we downloaded. Select the Check Box for “Skip Unattended Installation”. Then click “Next”. The configuration should look similar to the screenshot below.
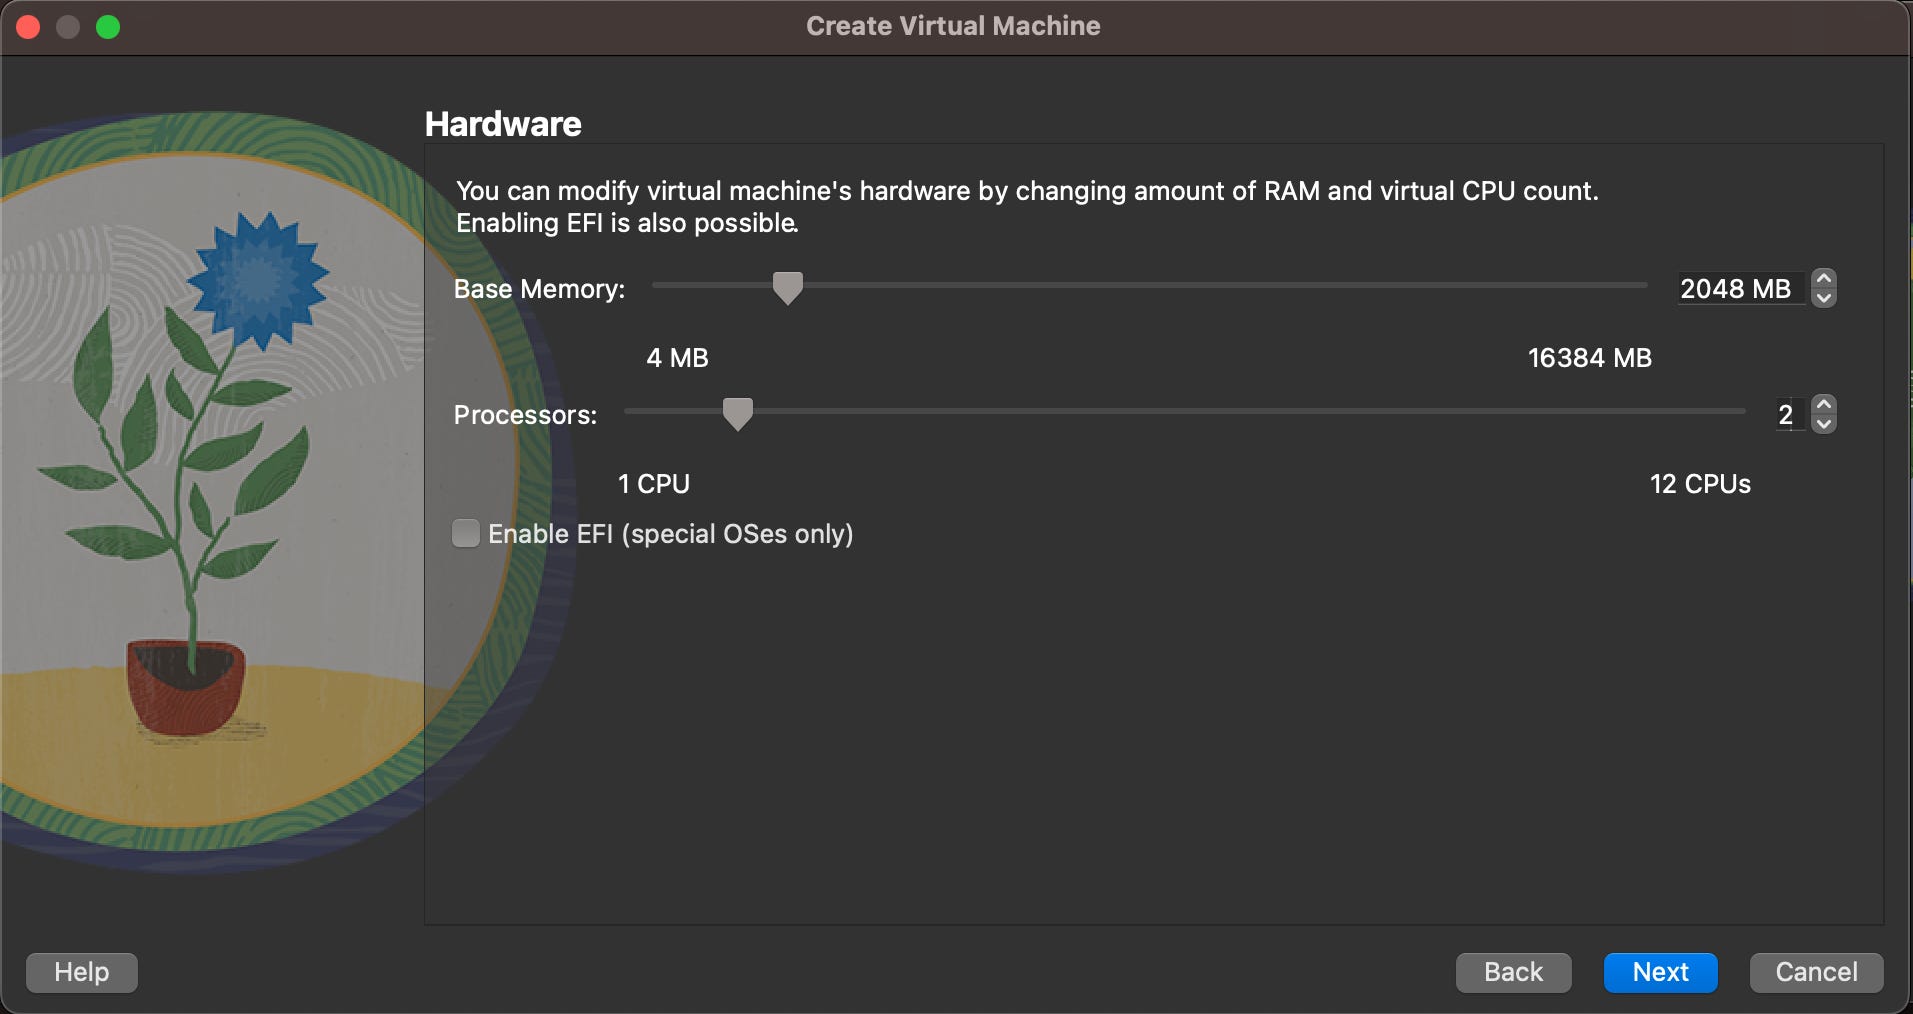
On the next page, we’ll leave “Base Memory” the default (2048 MB) and place “Processors” to 2. Then click “Next”.
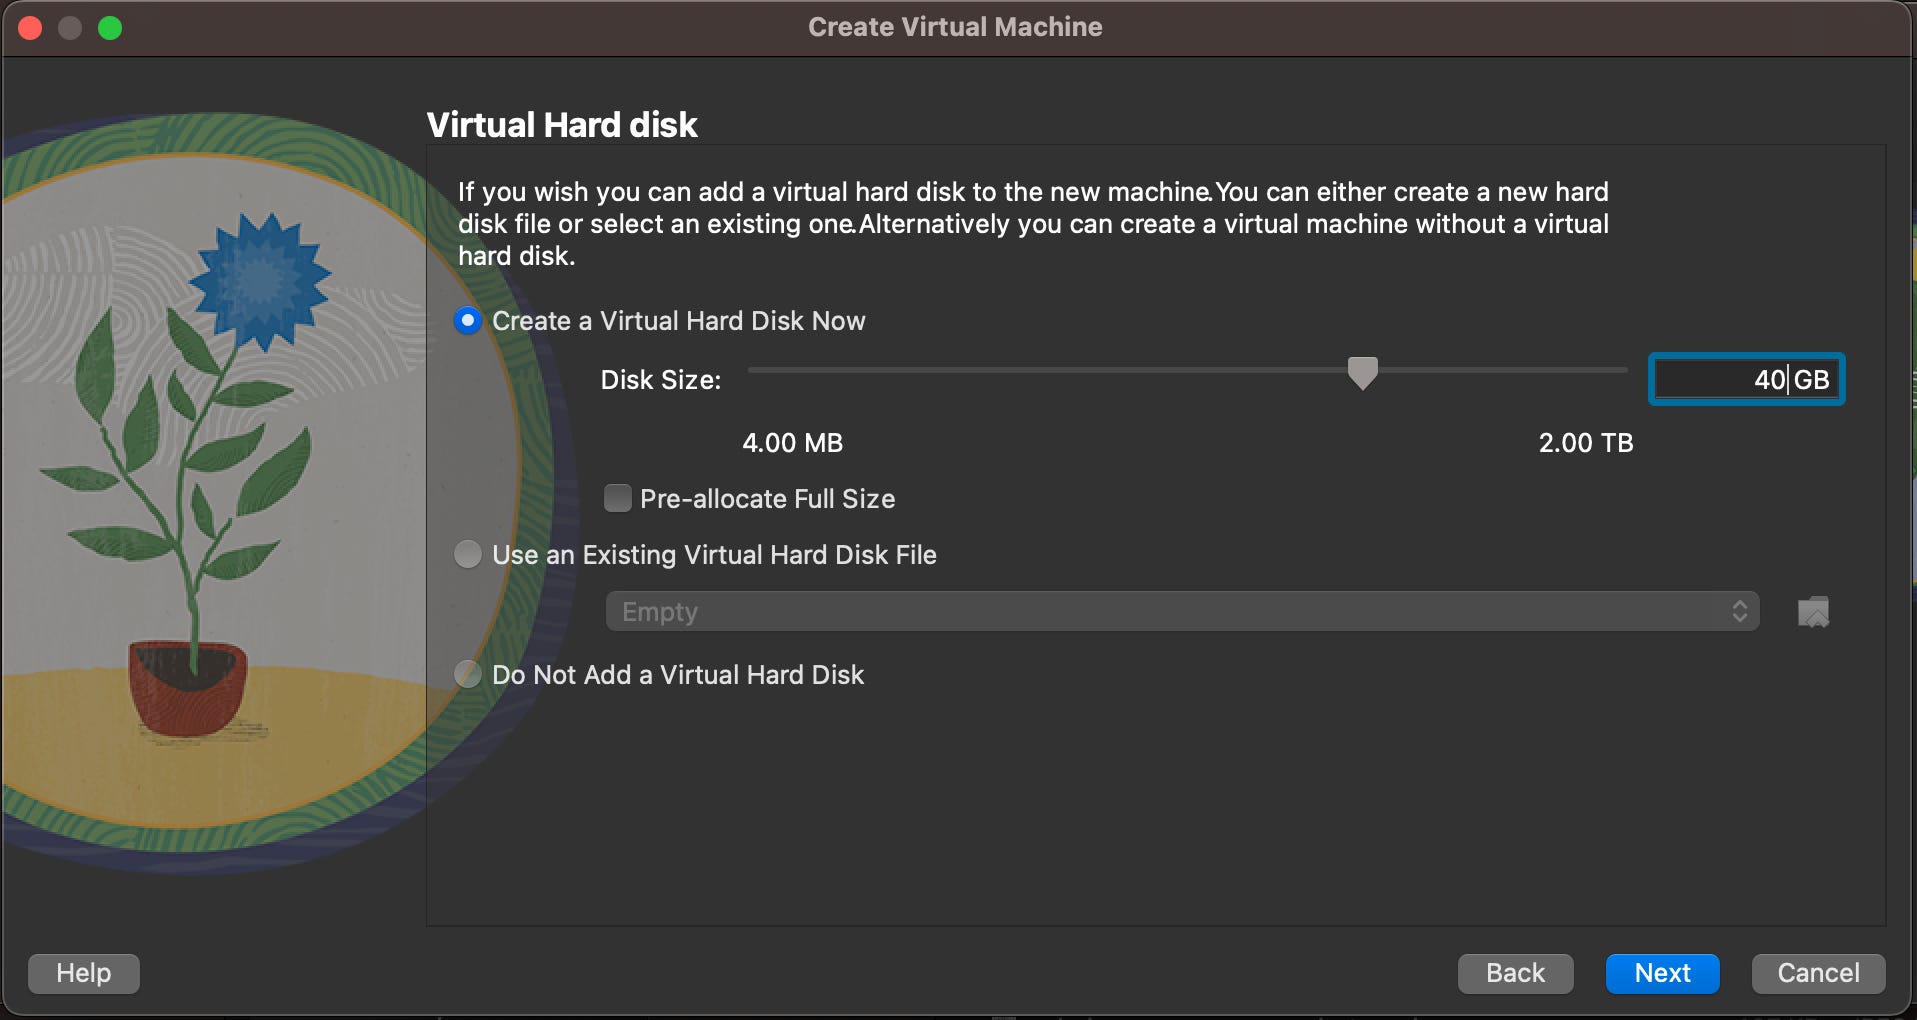
On the next page, we’ll leave the “Create a Virtual Hard Disk Now” box selected and make the size 40 GB. Then click “Next”.
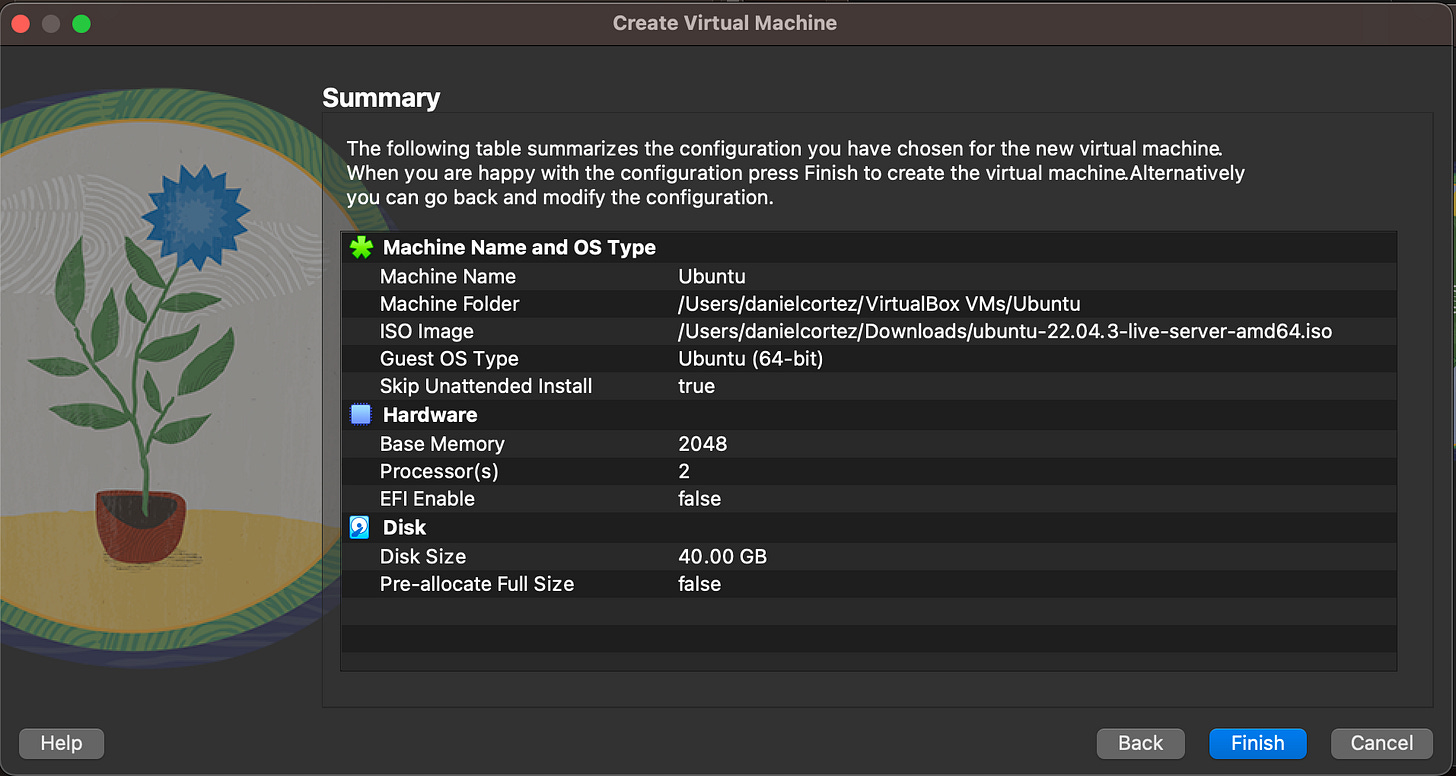
Once on the Summary page, click “Finish”.
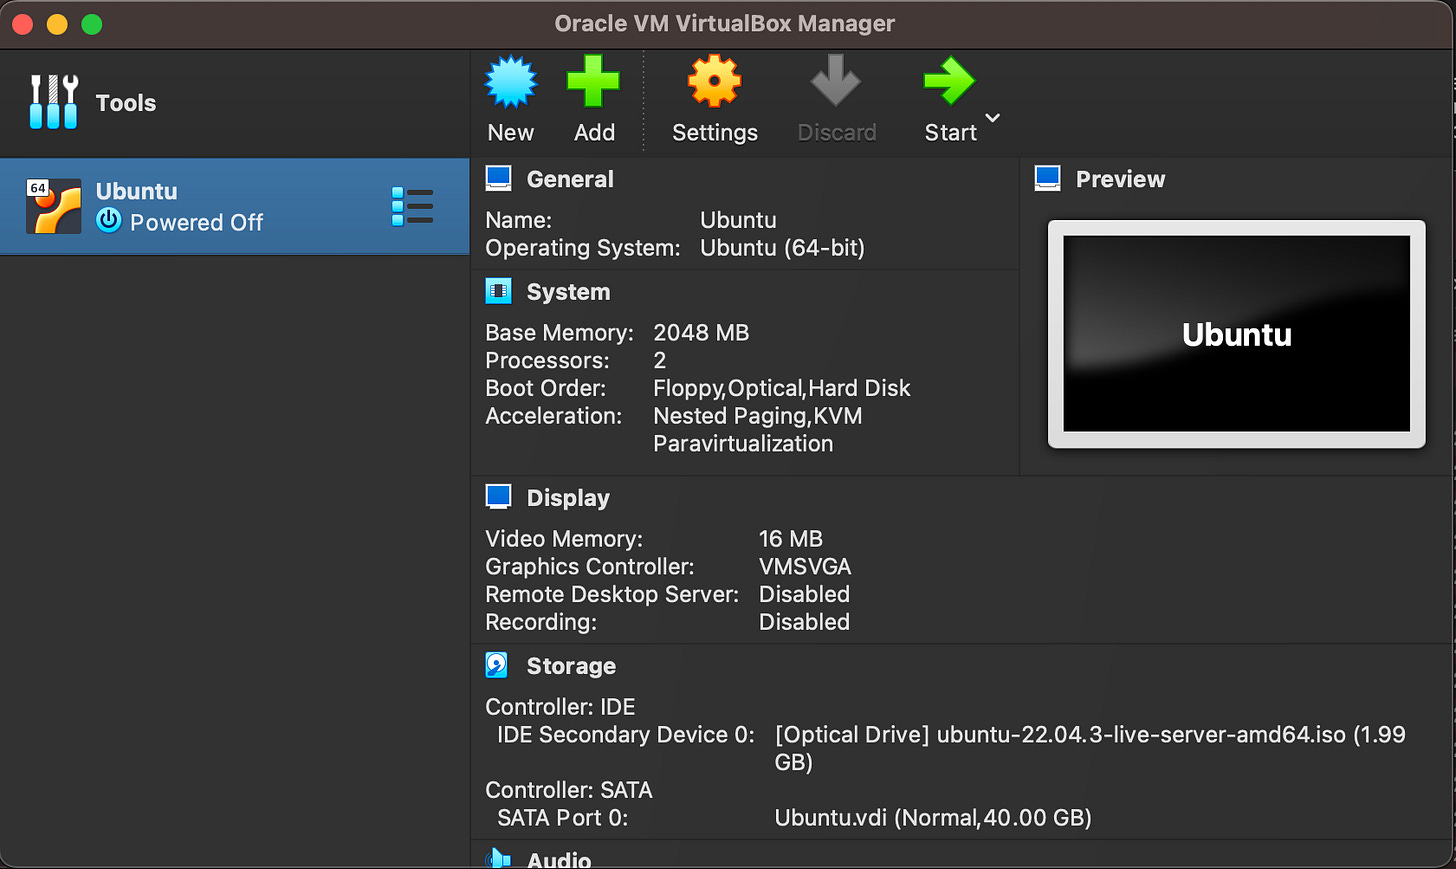
We just finished creating a VM!
Install the Ubuntu Server Operating System (OS)
At this point, we have the VM created and can start installing the Linux OS. Follow these steps to get the OS installed.
Make sure the Ubuntu VM we just created is selected, then click “Start”.
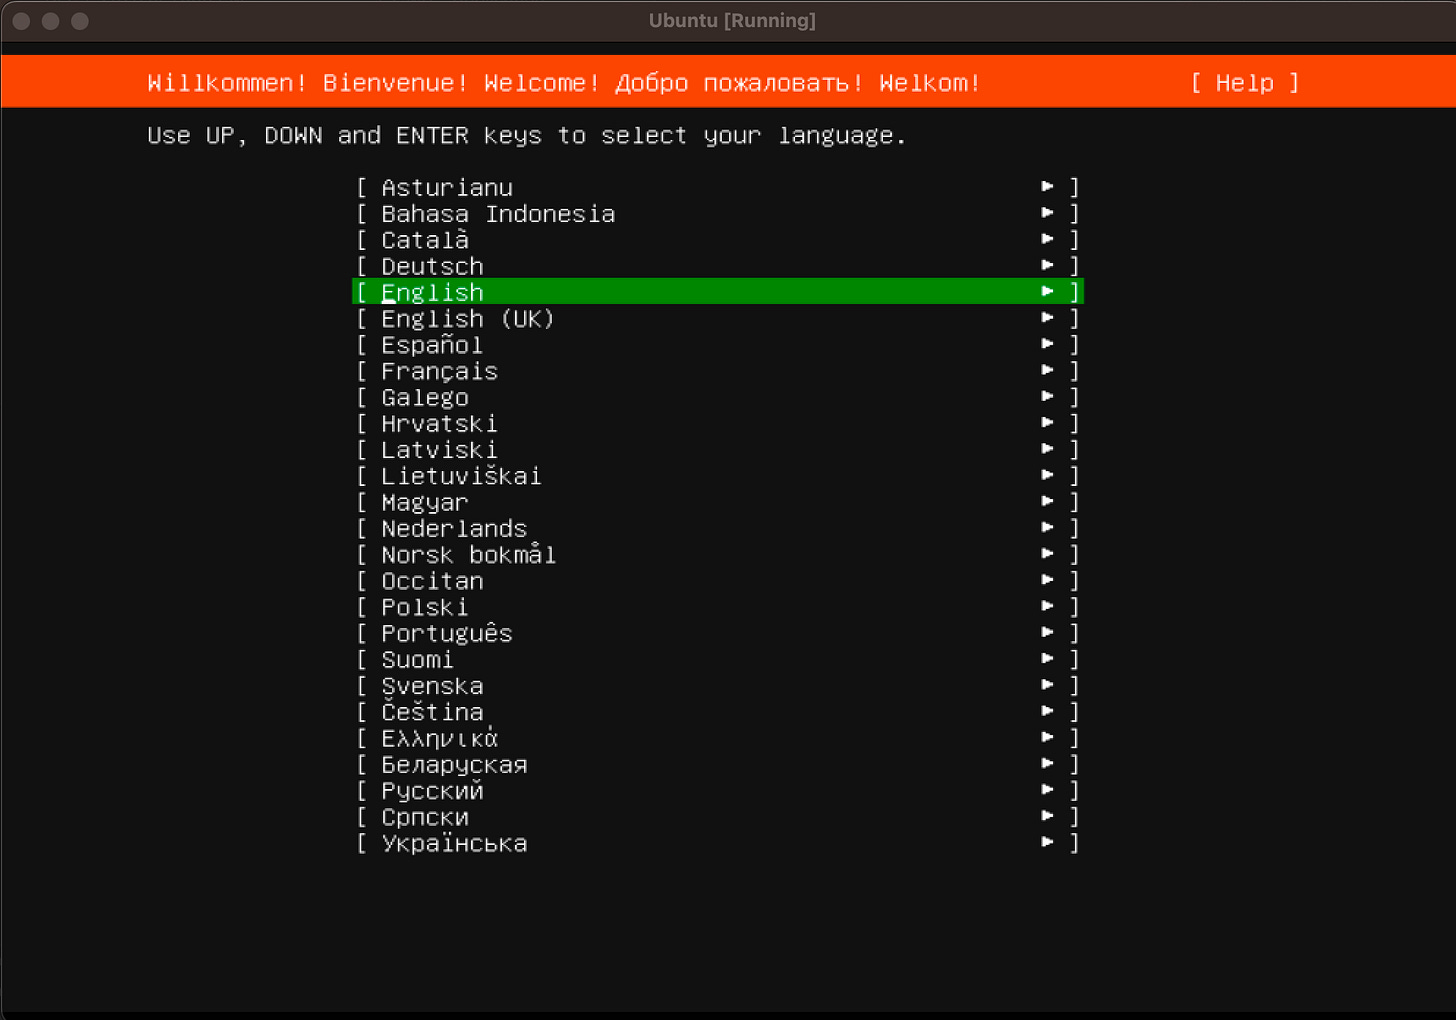
Let the initial startup run and it will eventually stop at the language page. Select “English” and hit Enter.
If you get a notice about an installer update, go ahead and select “Update to the new installer” and then hit Enter.

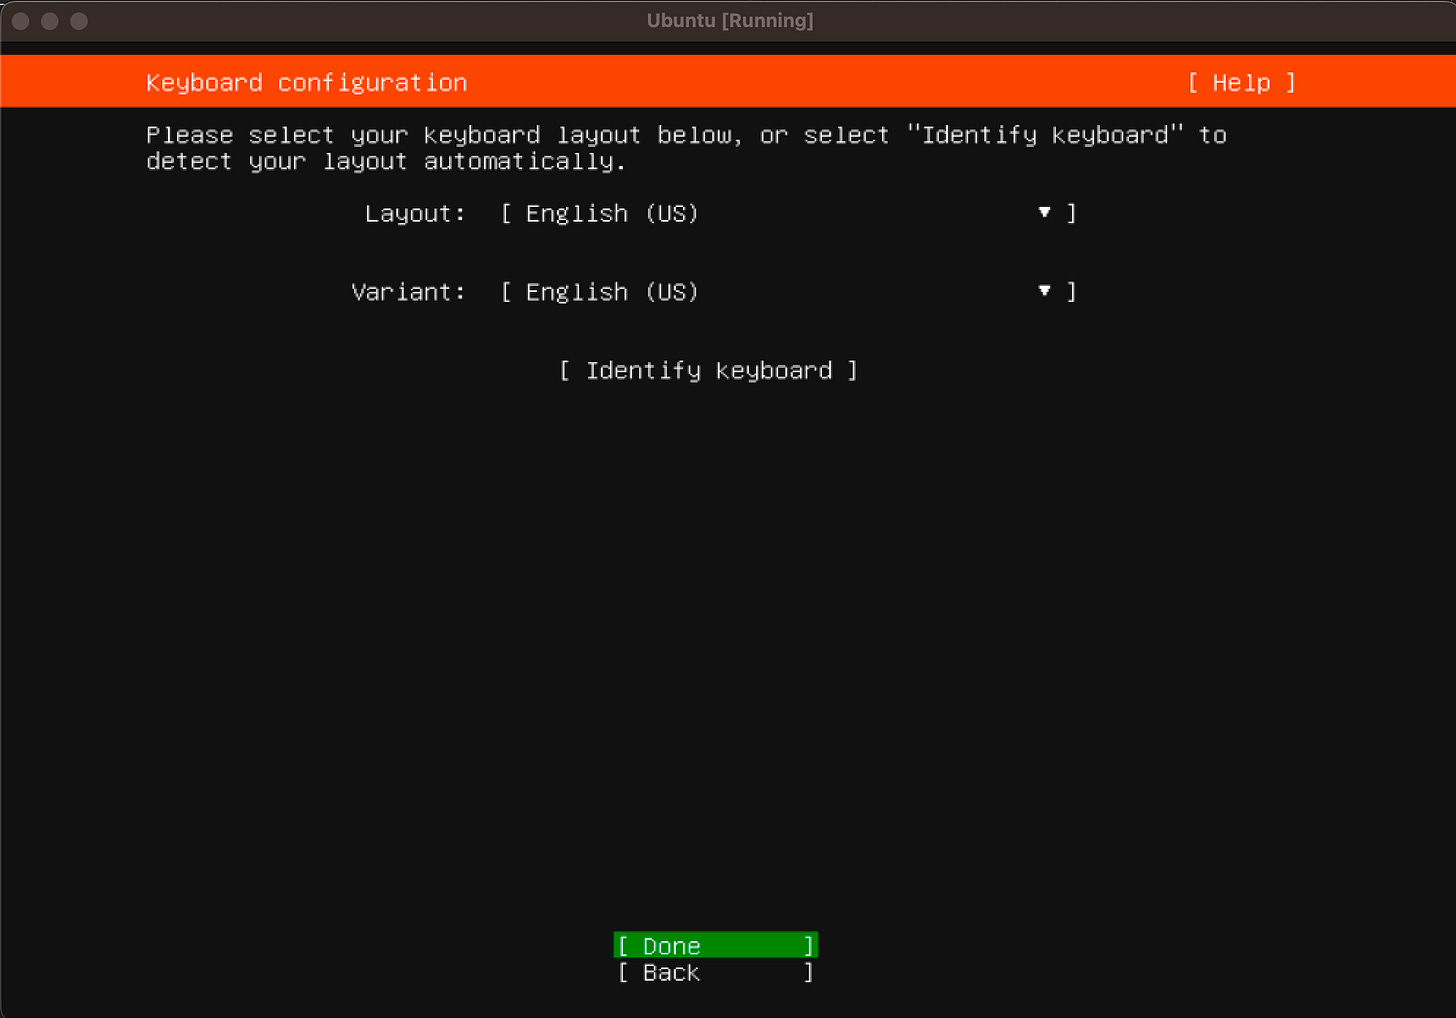
At the Keyboard configuration page, select the appropriate options and hit Enter on “Done”.
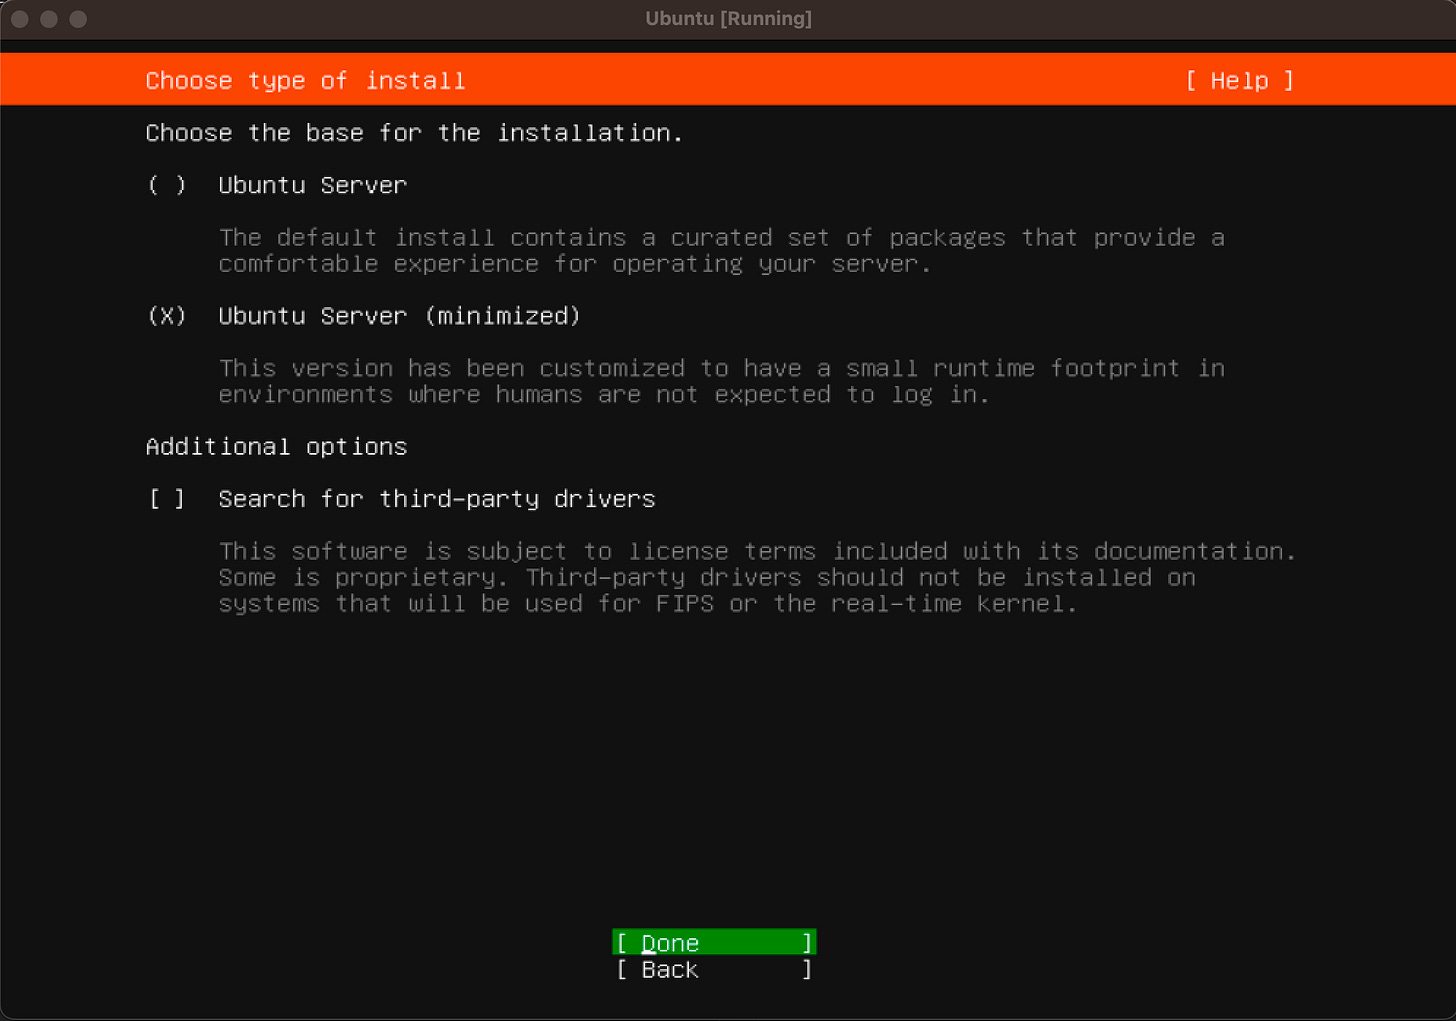
At the Choose type of install page, select the “Ubuntu Server (minimized)” option and then hit Enter on “Done”.
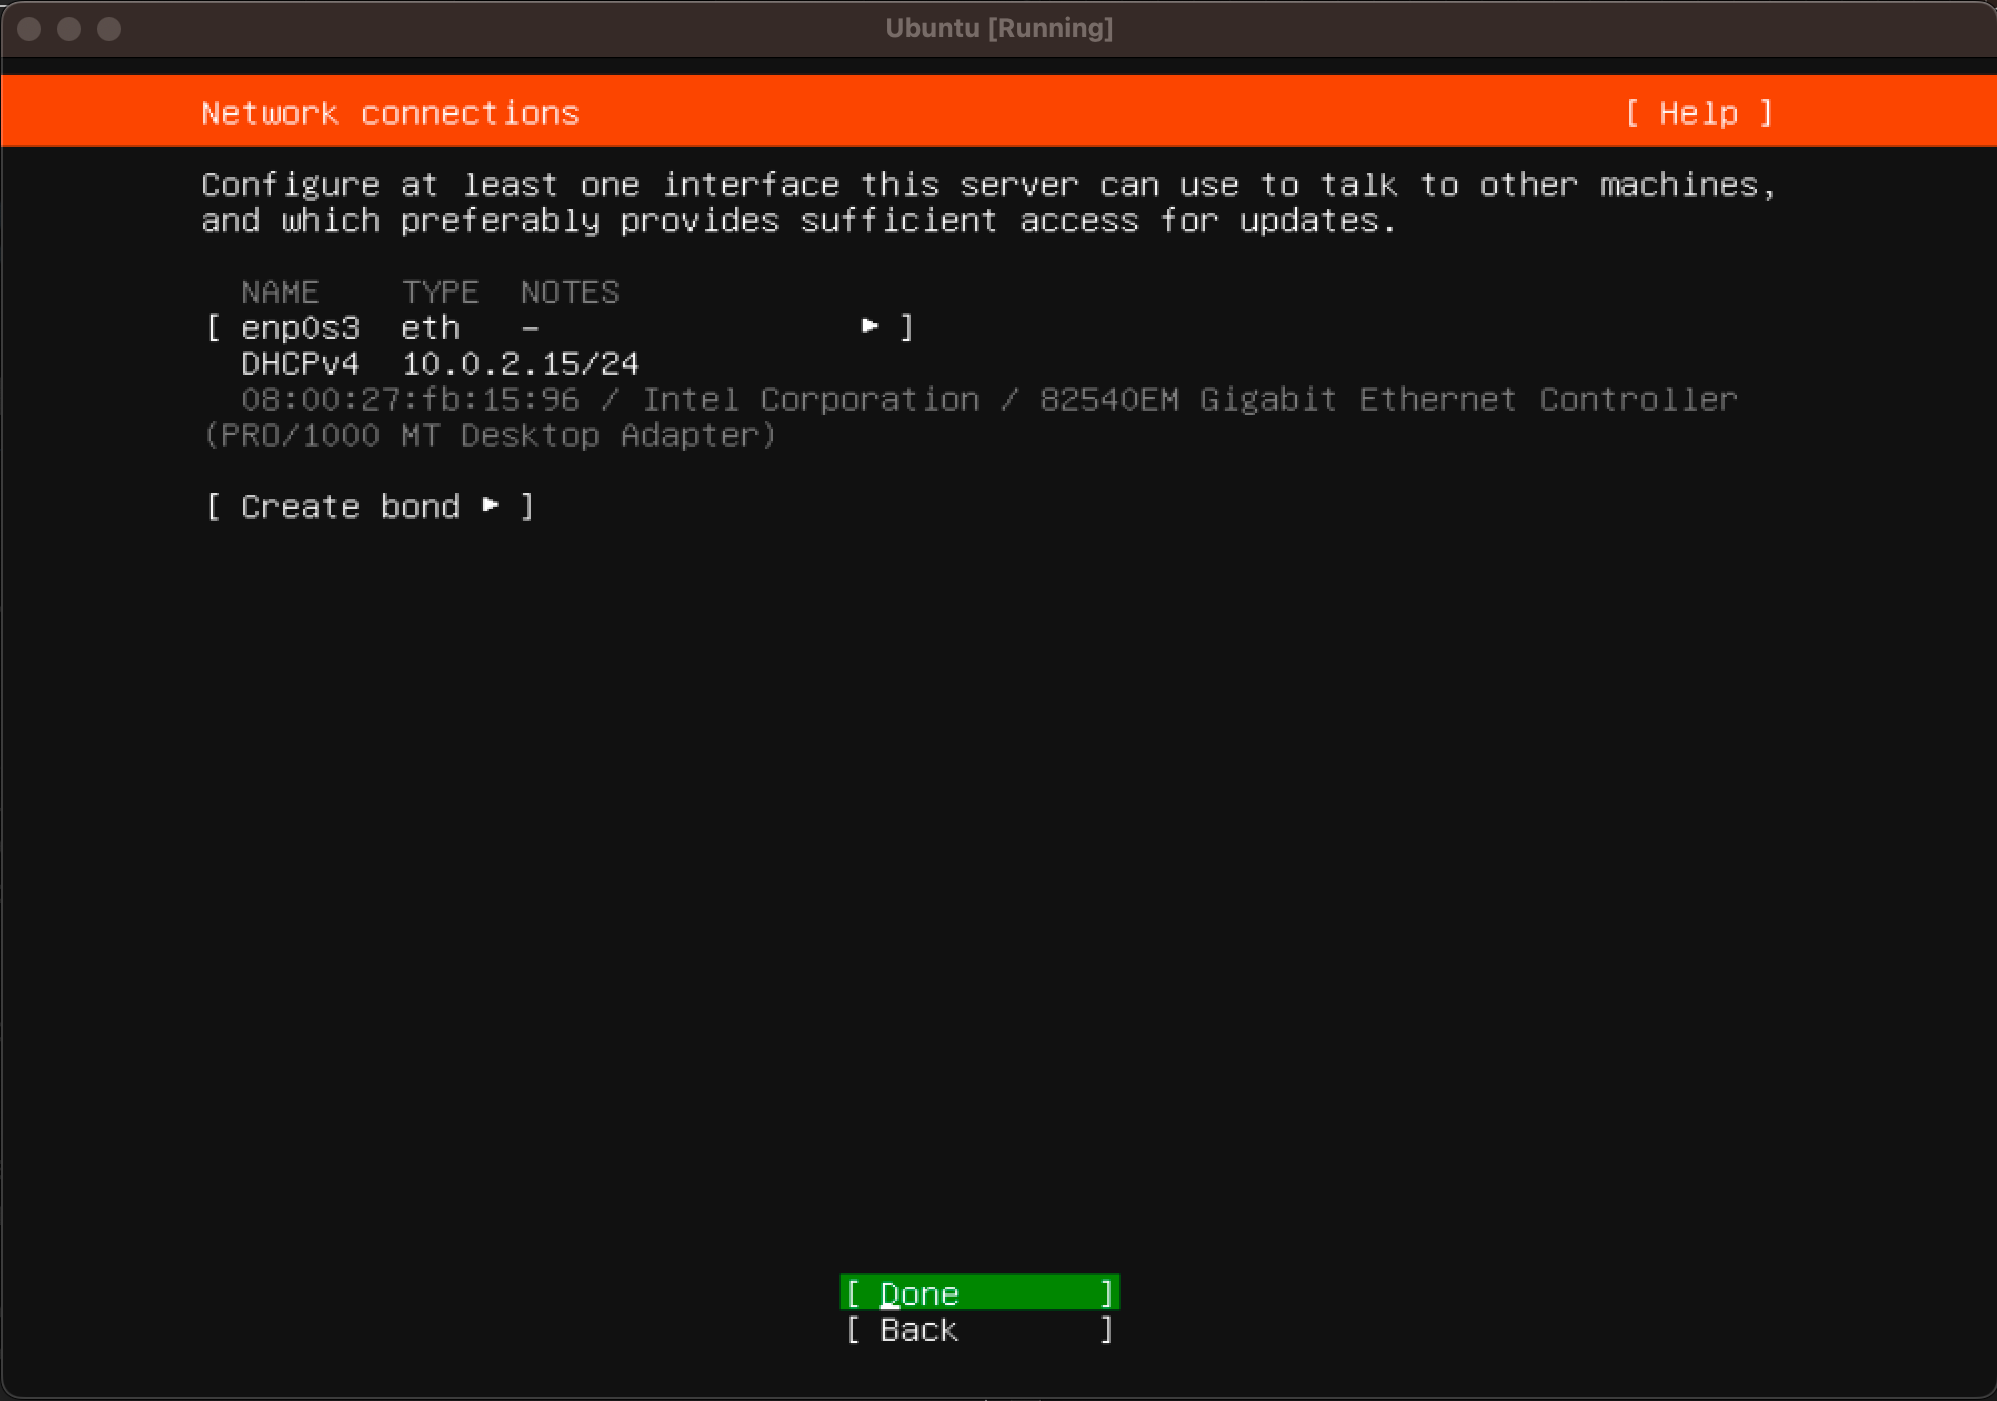
Now at the Network connections page, you shouldn’t need to make any changes as long as you see “DHCPv4” with an IP address. Hit Enter on “Done” to move on. Reference screenshot below.

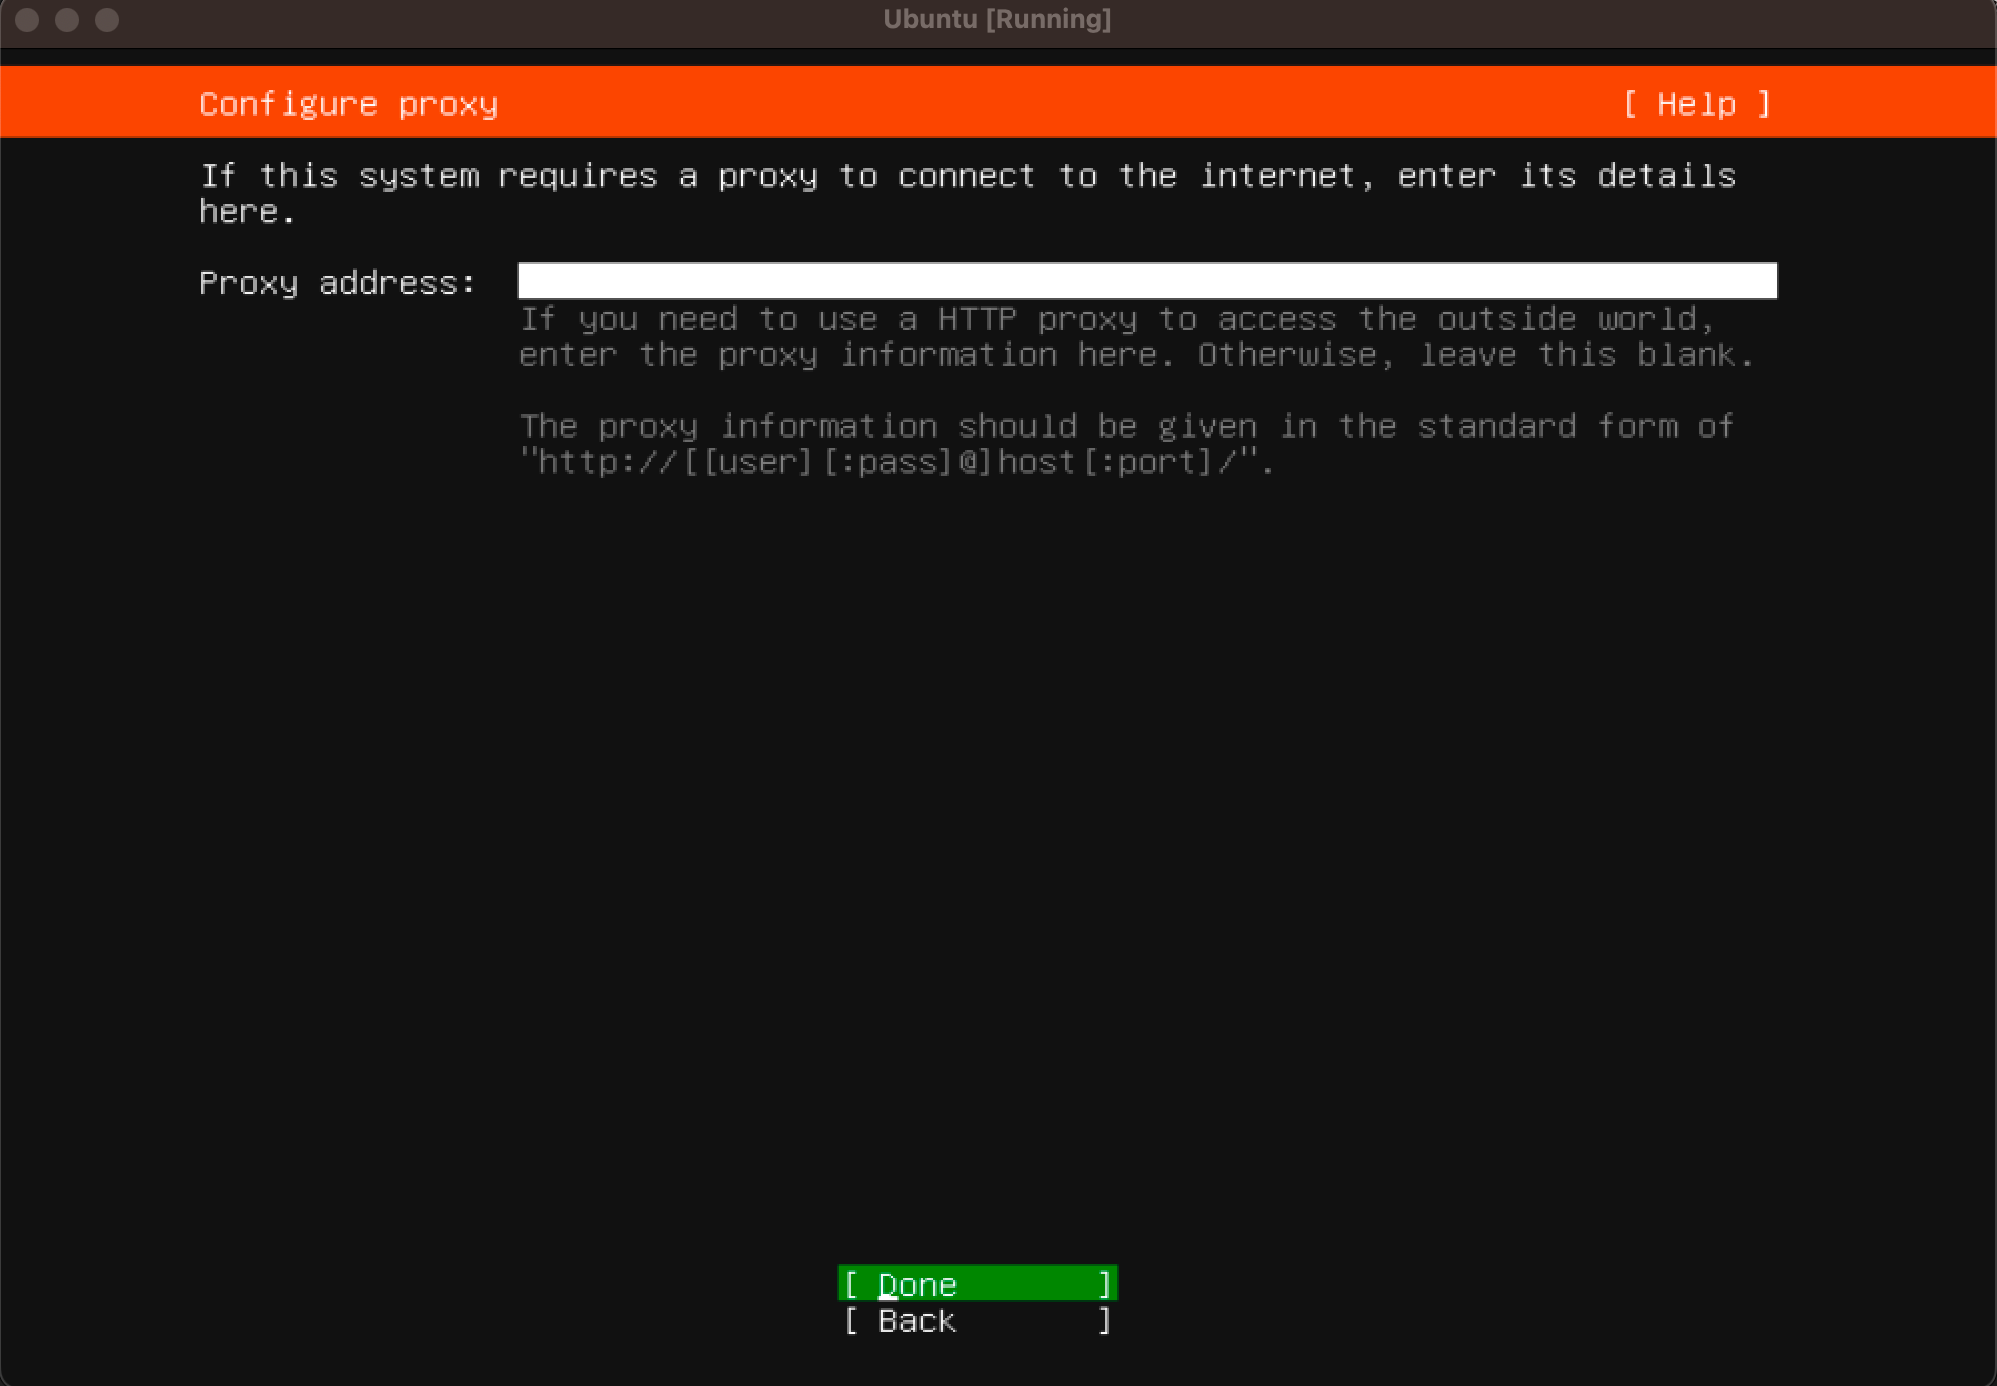
On the Configure proxy page, we won’t need to change anything. Hit Enter on “Done” to proceed.


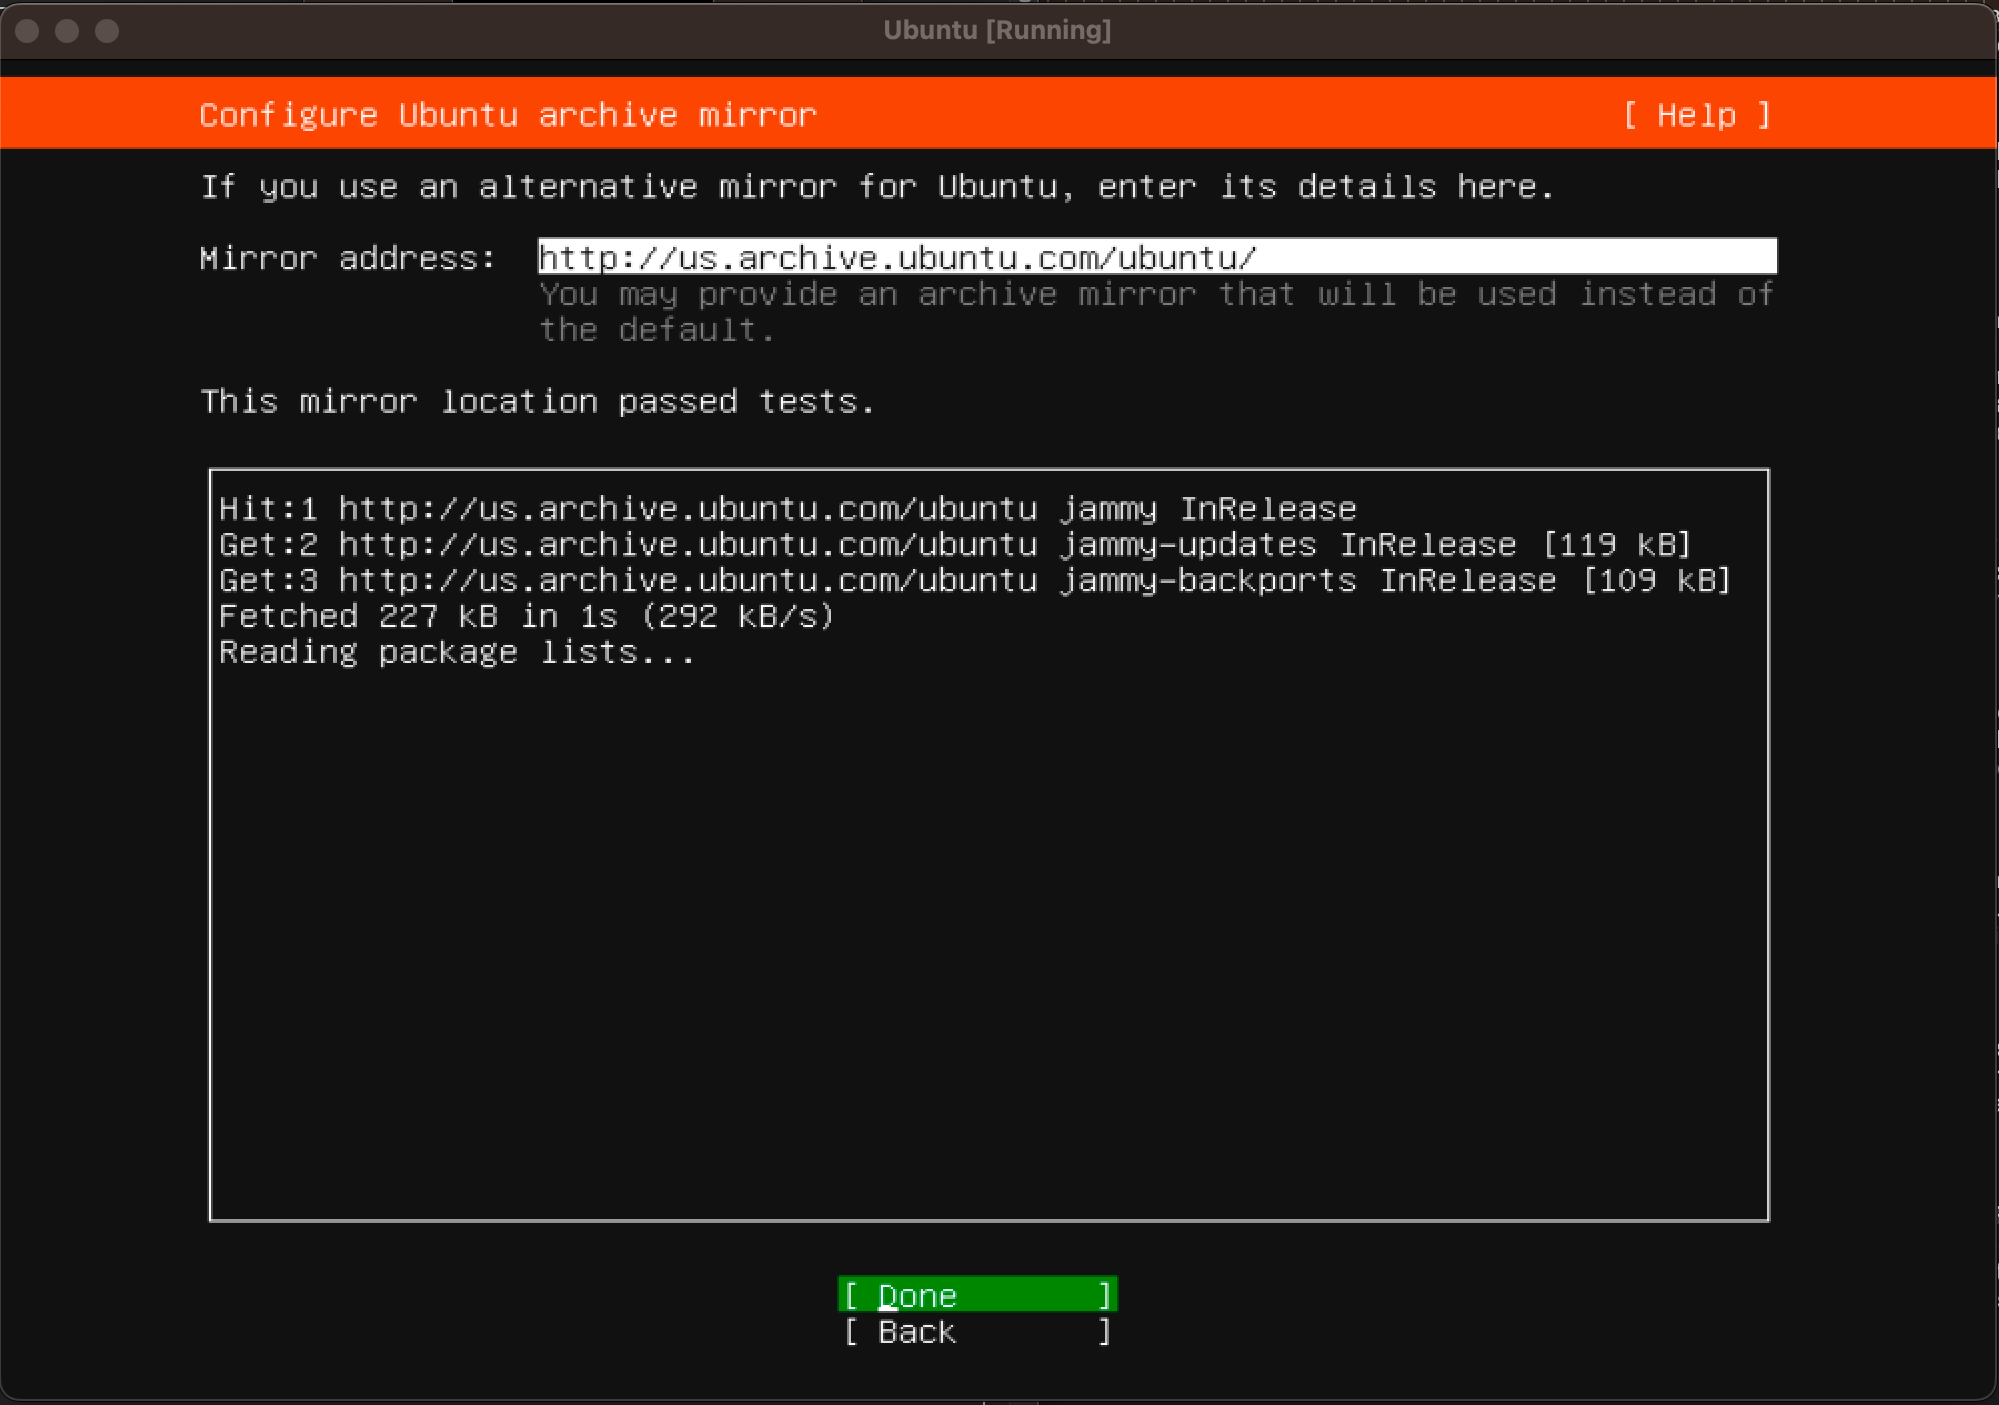
8. At the Configure Ubuntu archive mirror page, we also won’t need to make any changes. Hit Enter on “Done” to continue.
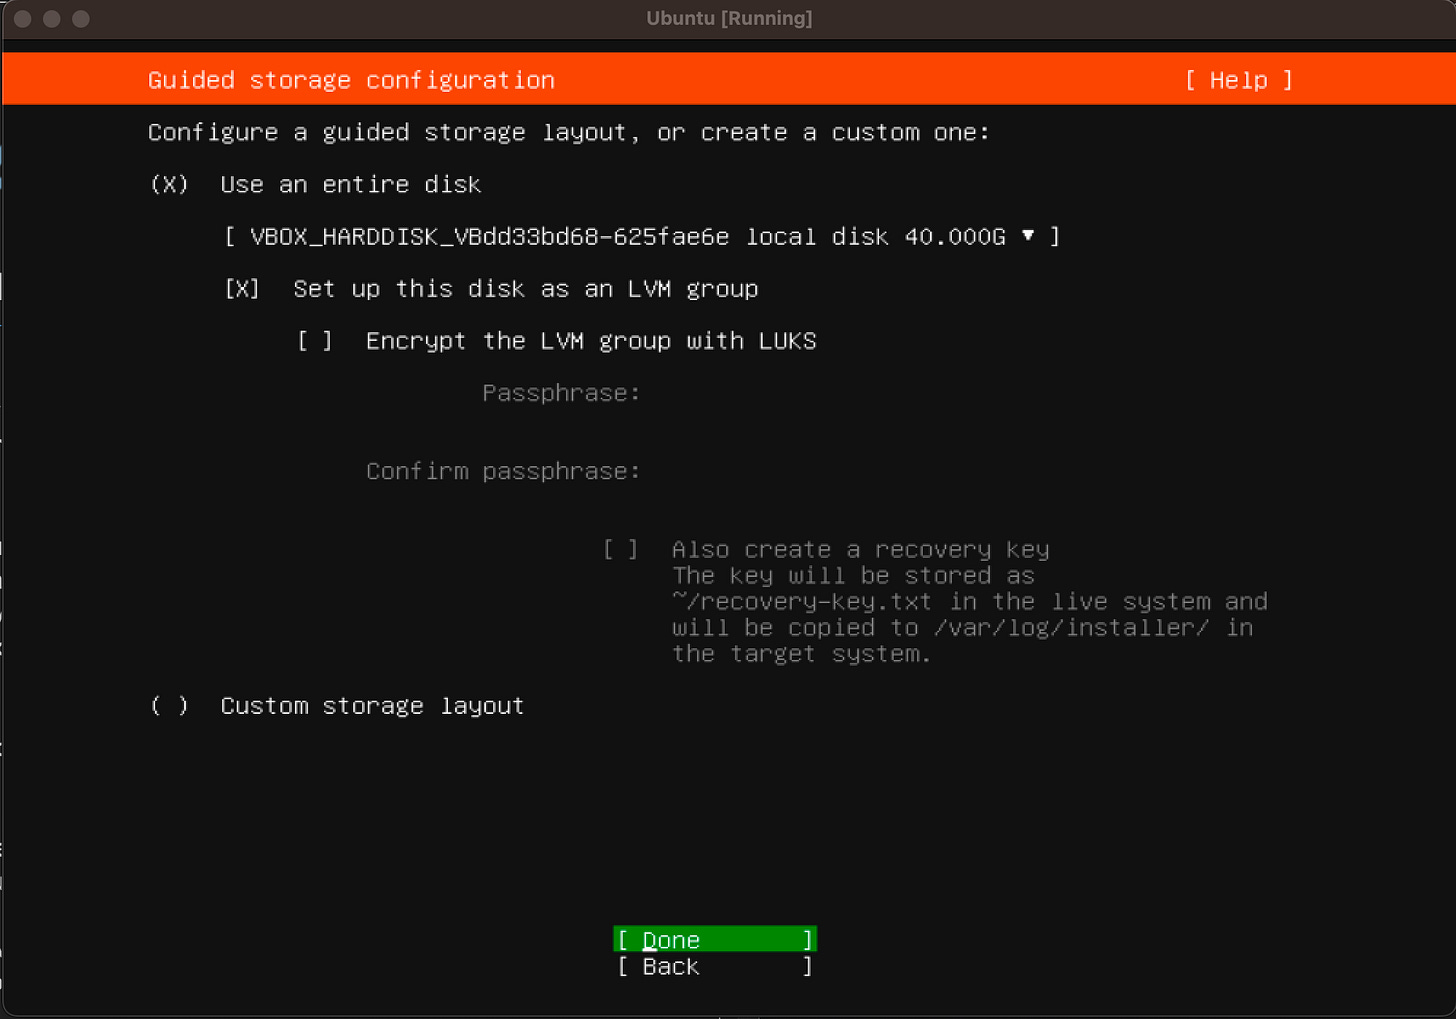
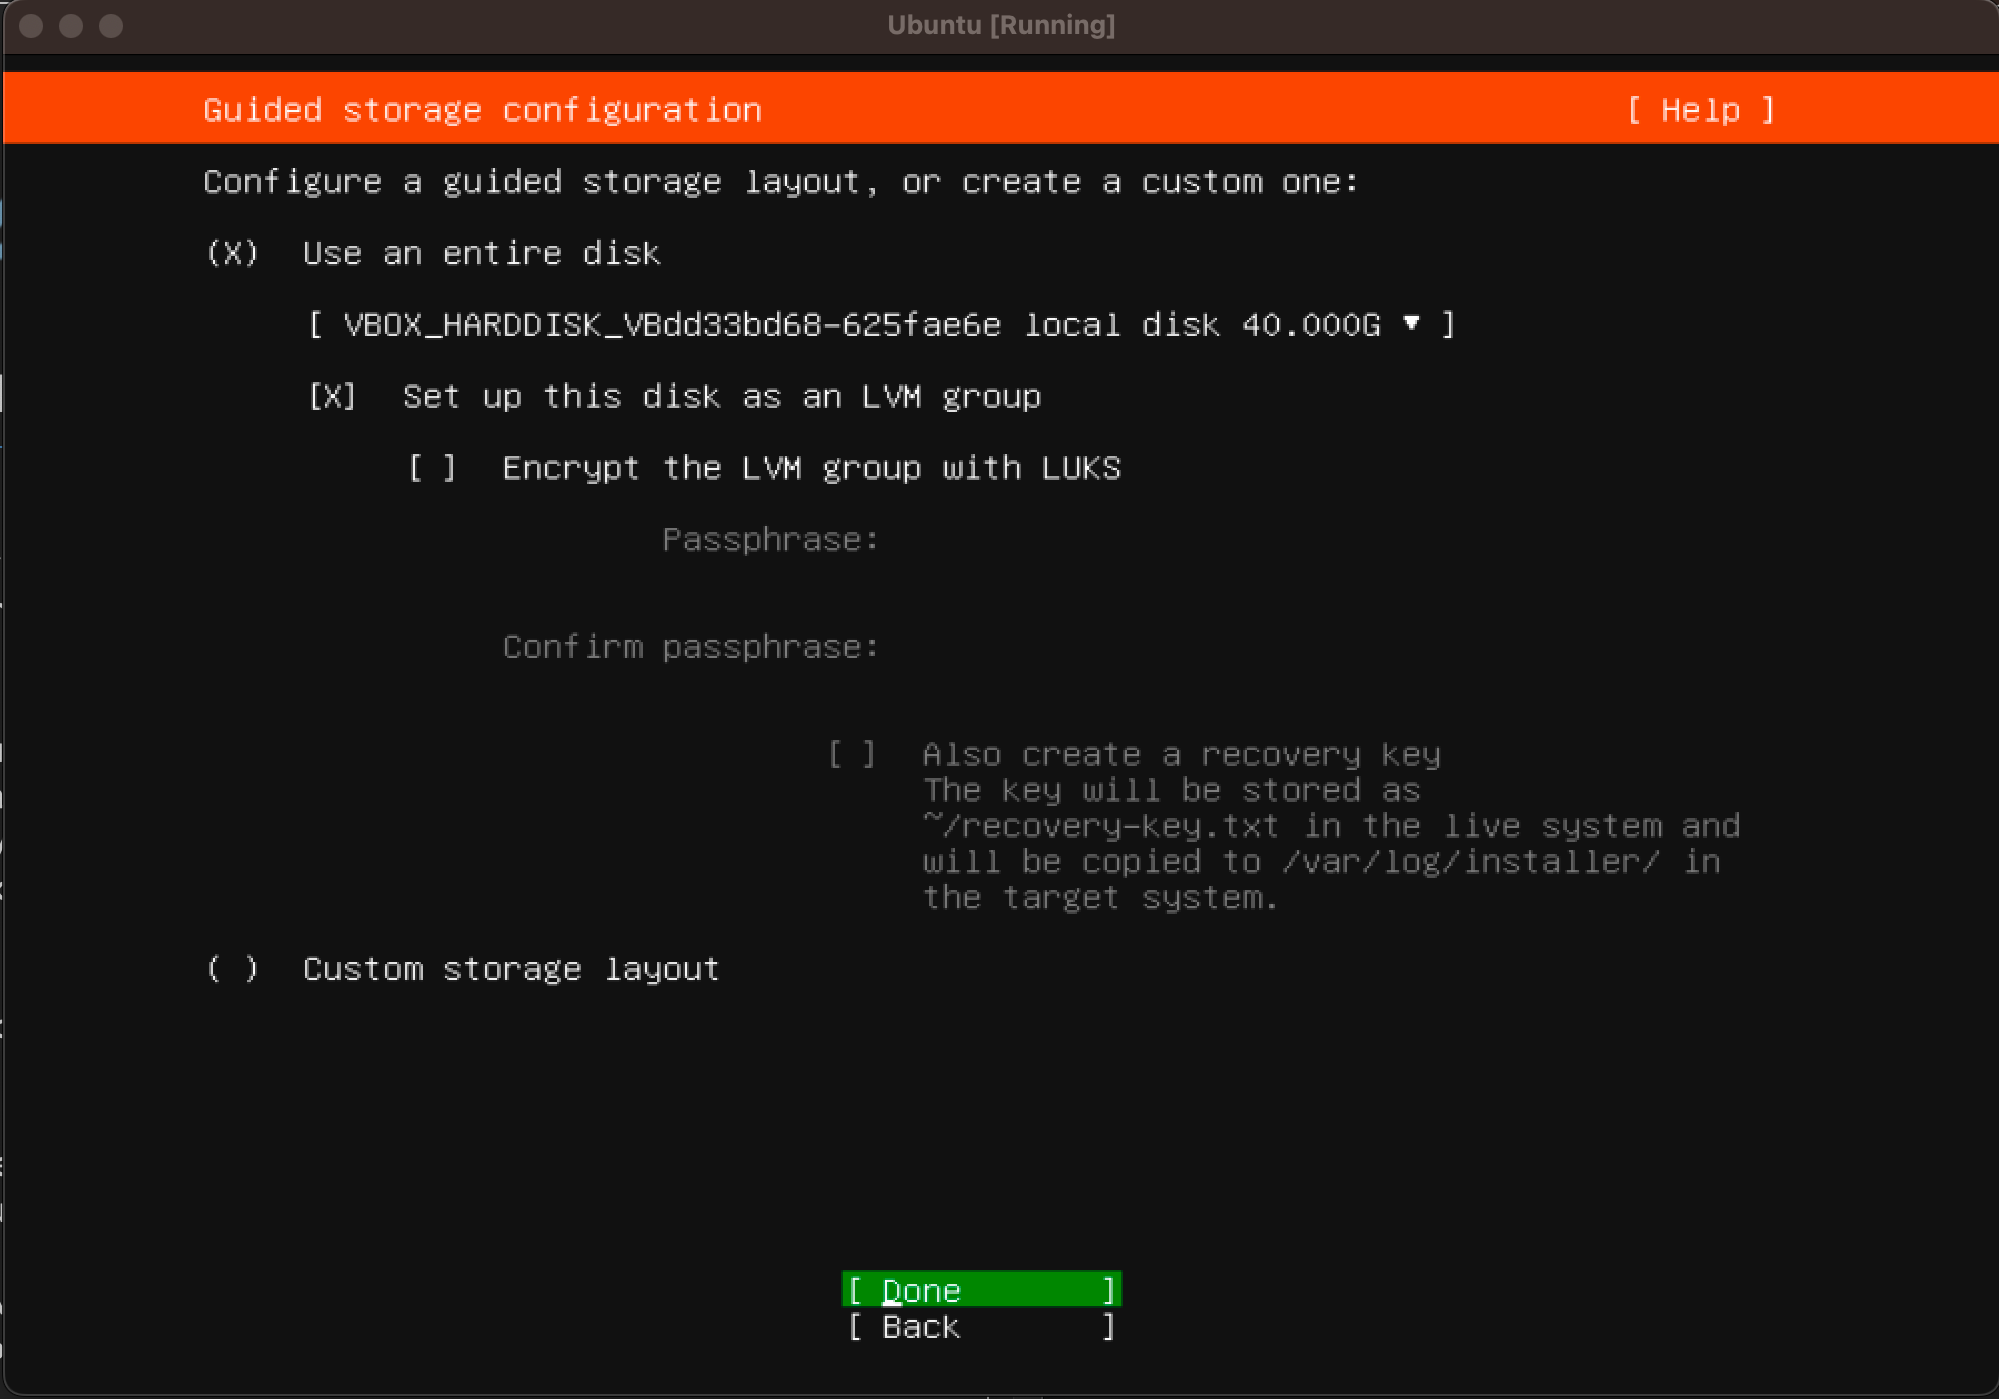
At the Guided storage configuration, we can leave all of the defaults as is. Hit Enter on "Done” to continue.
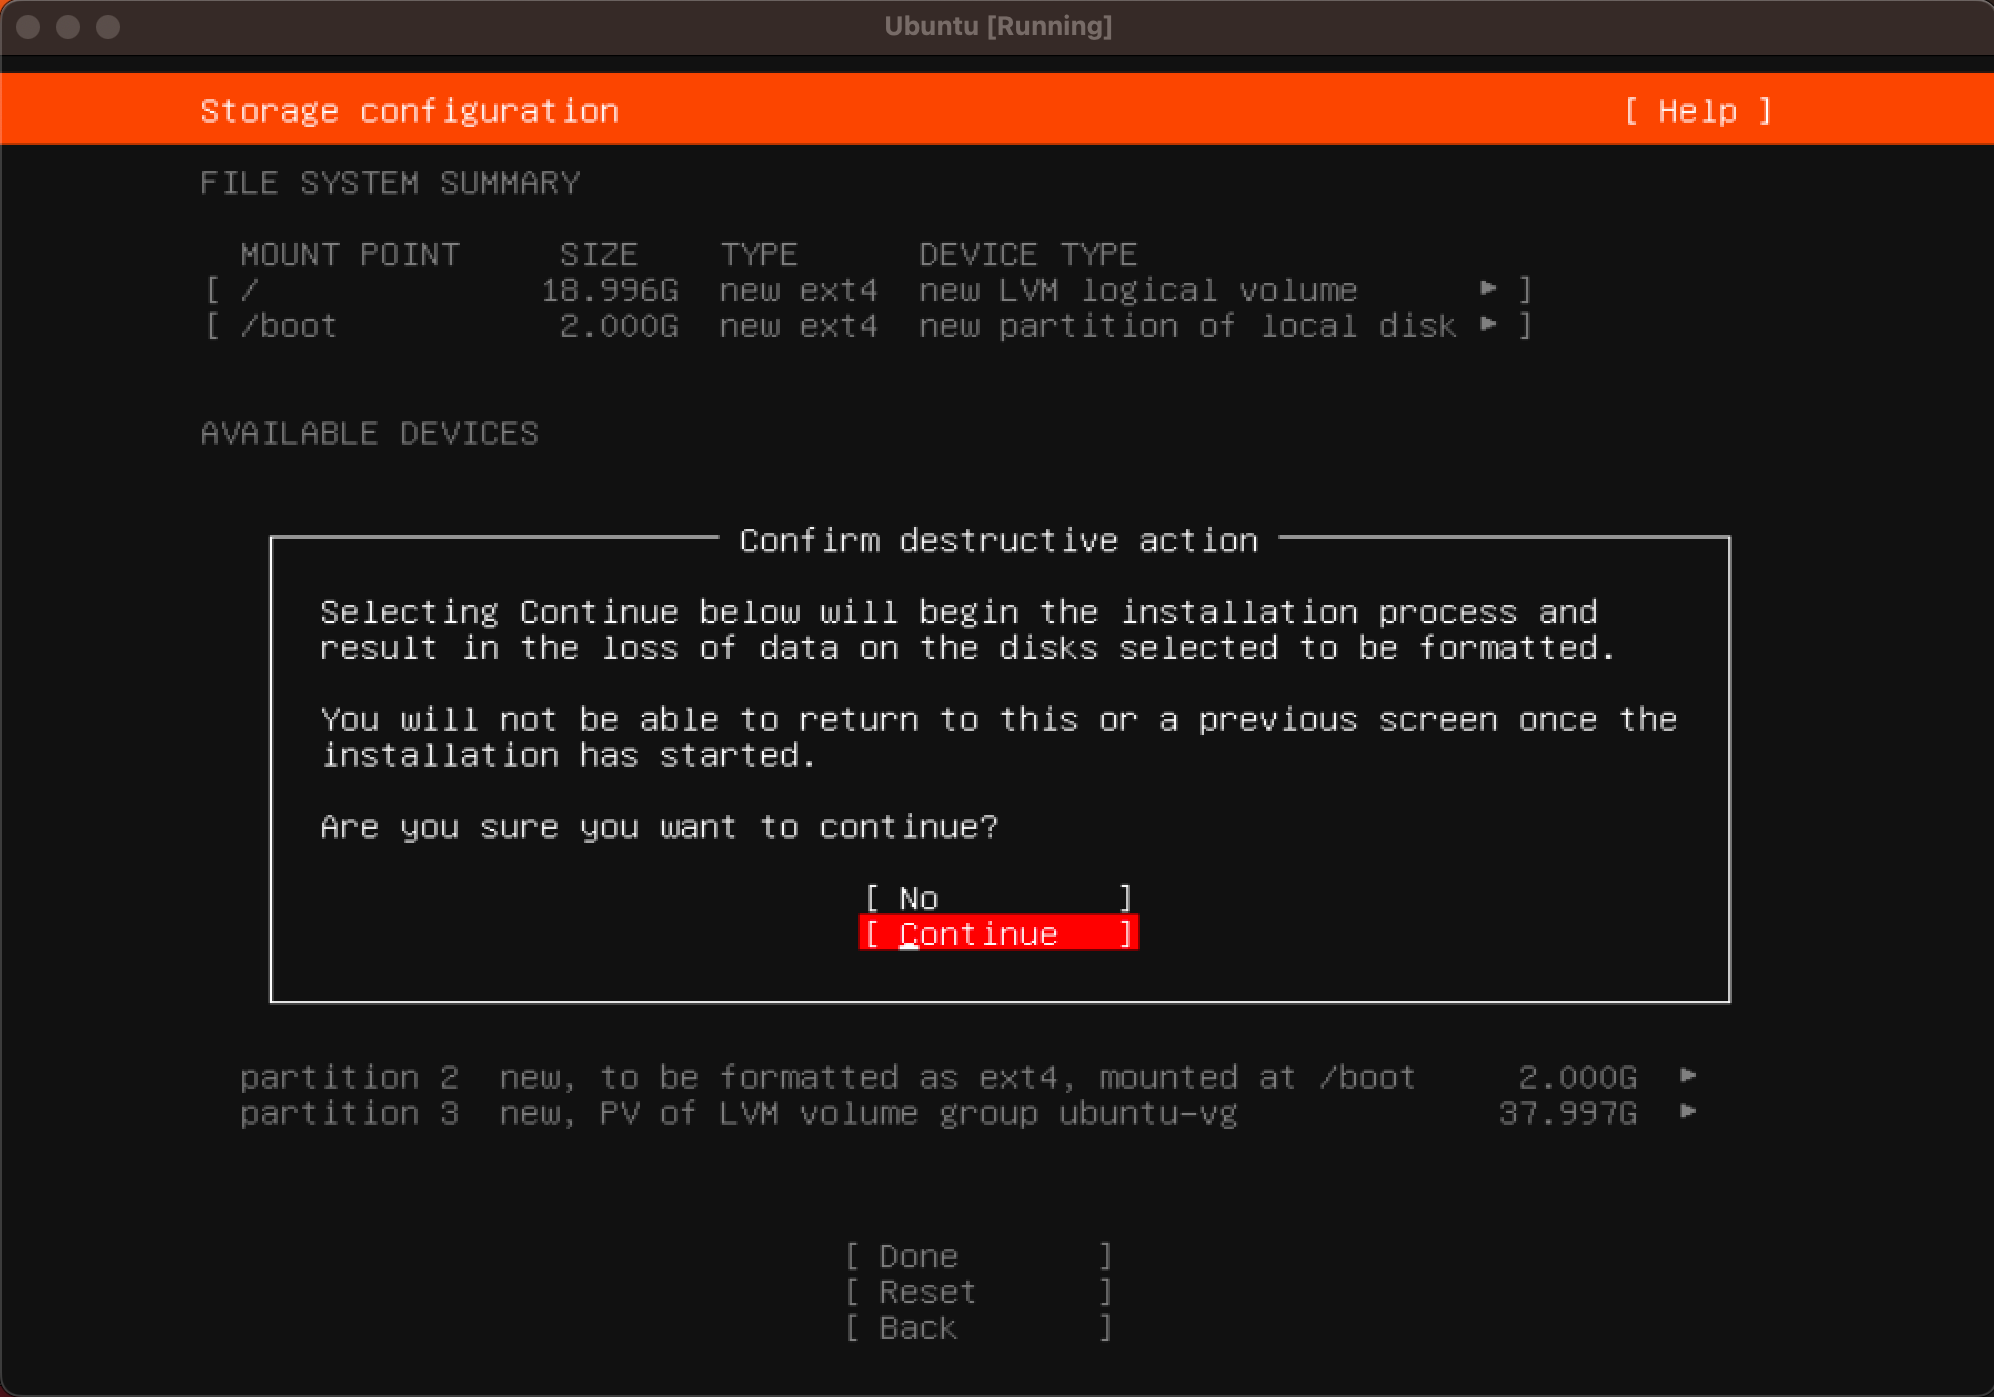
Same thing for the Storage configuration page. Hit Enter on “Done”.

A box should pop-up named “Confirm destructive action”. Don’t be alarmed, we want to “Continue”.

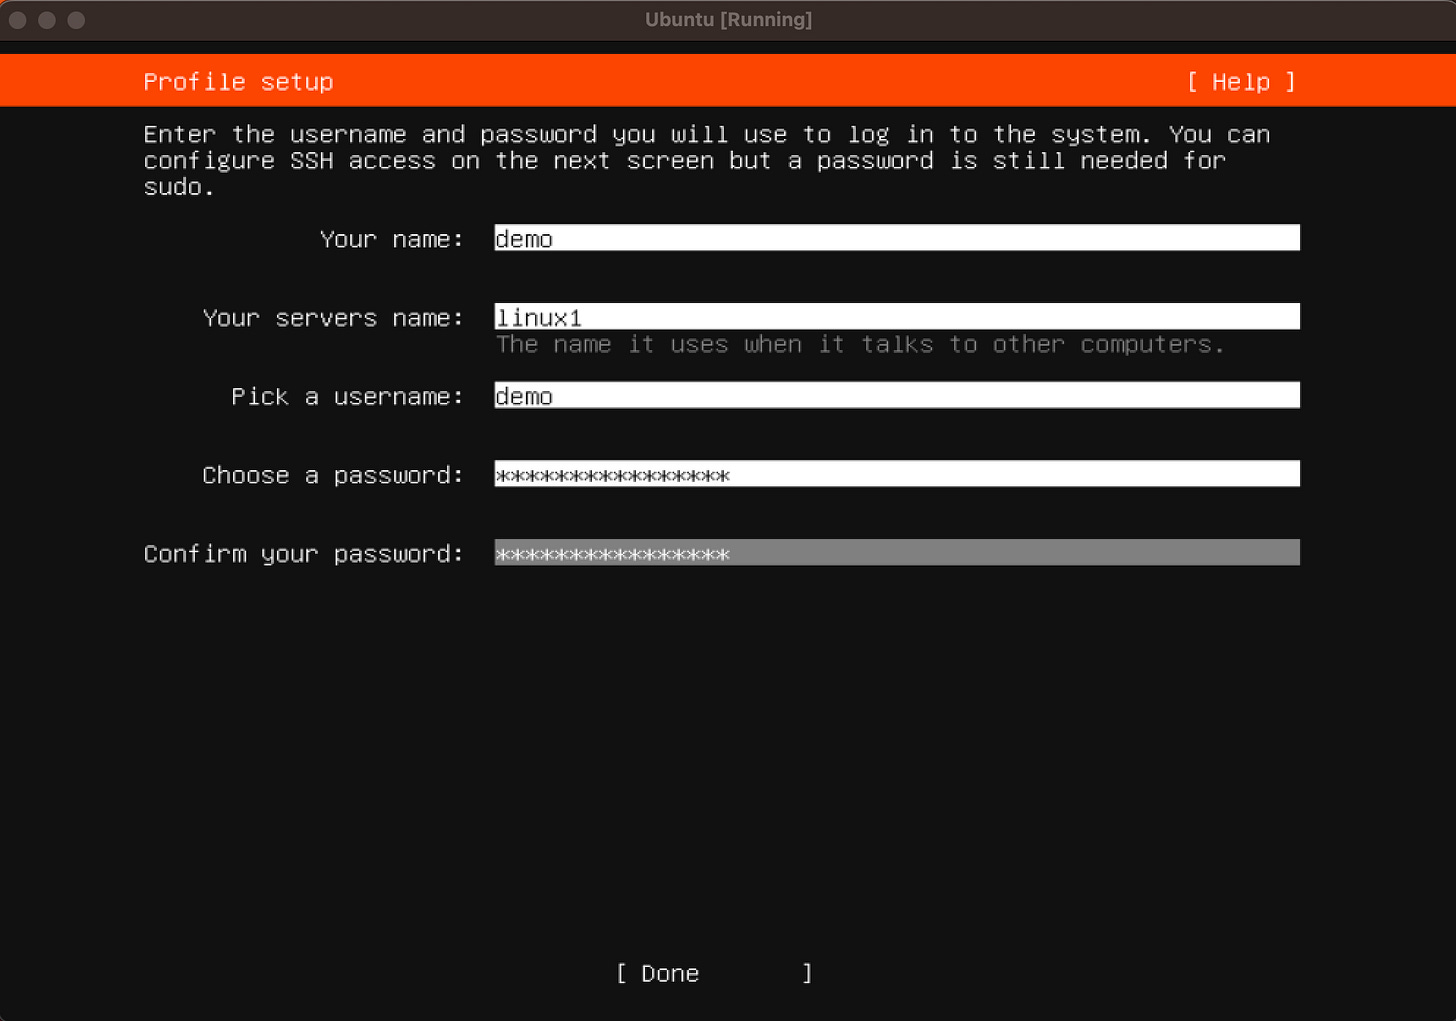
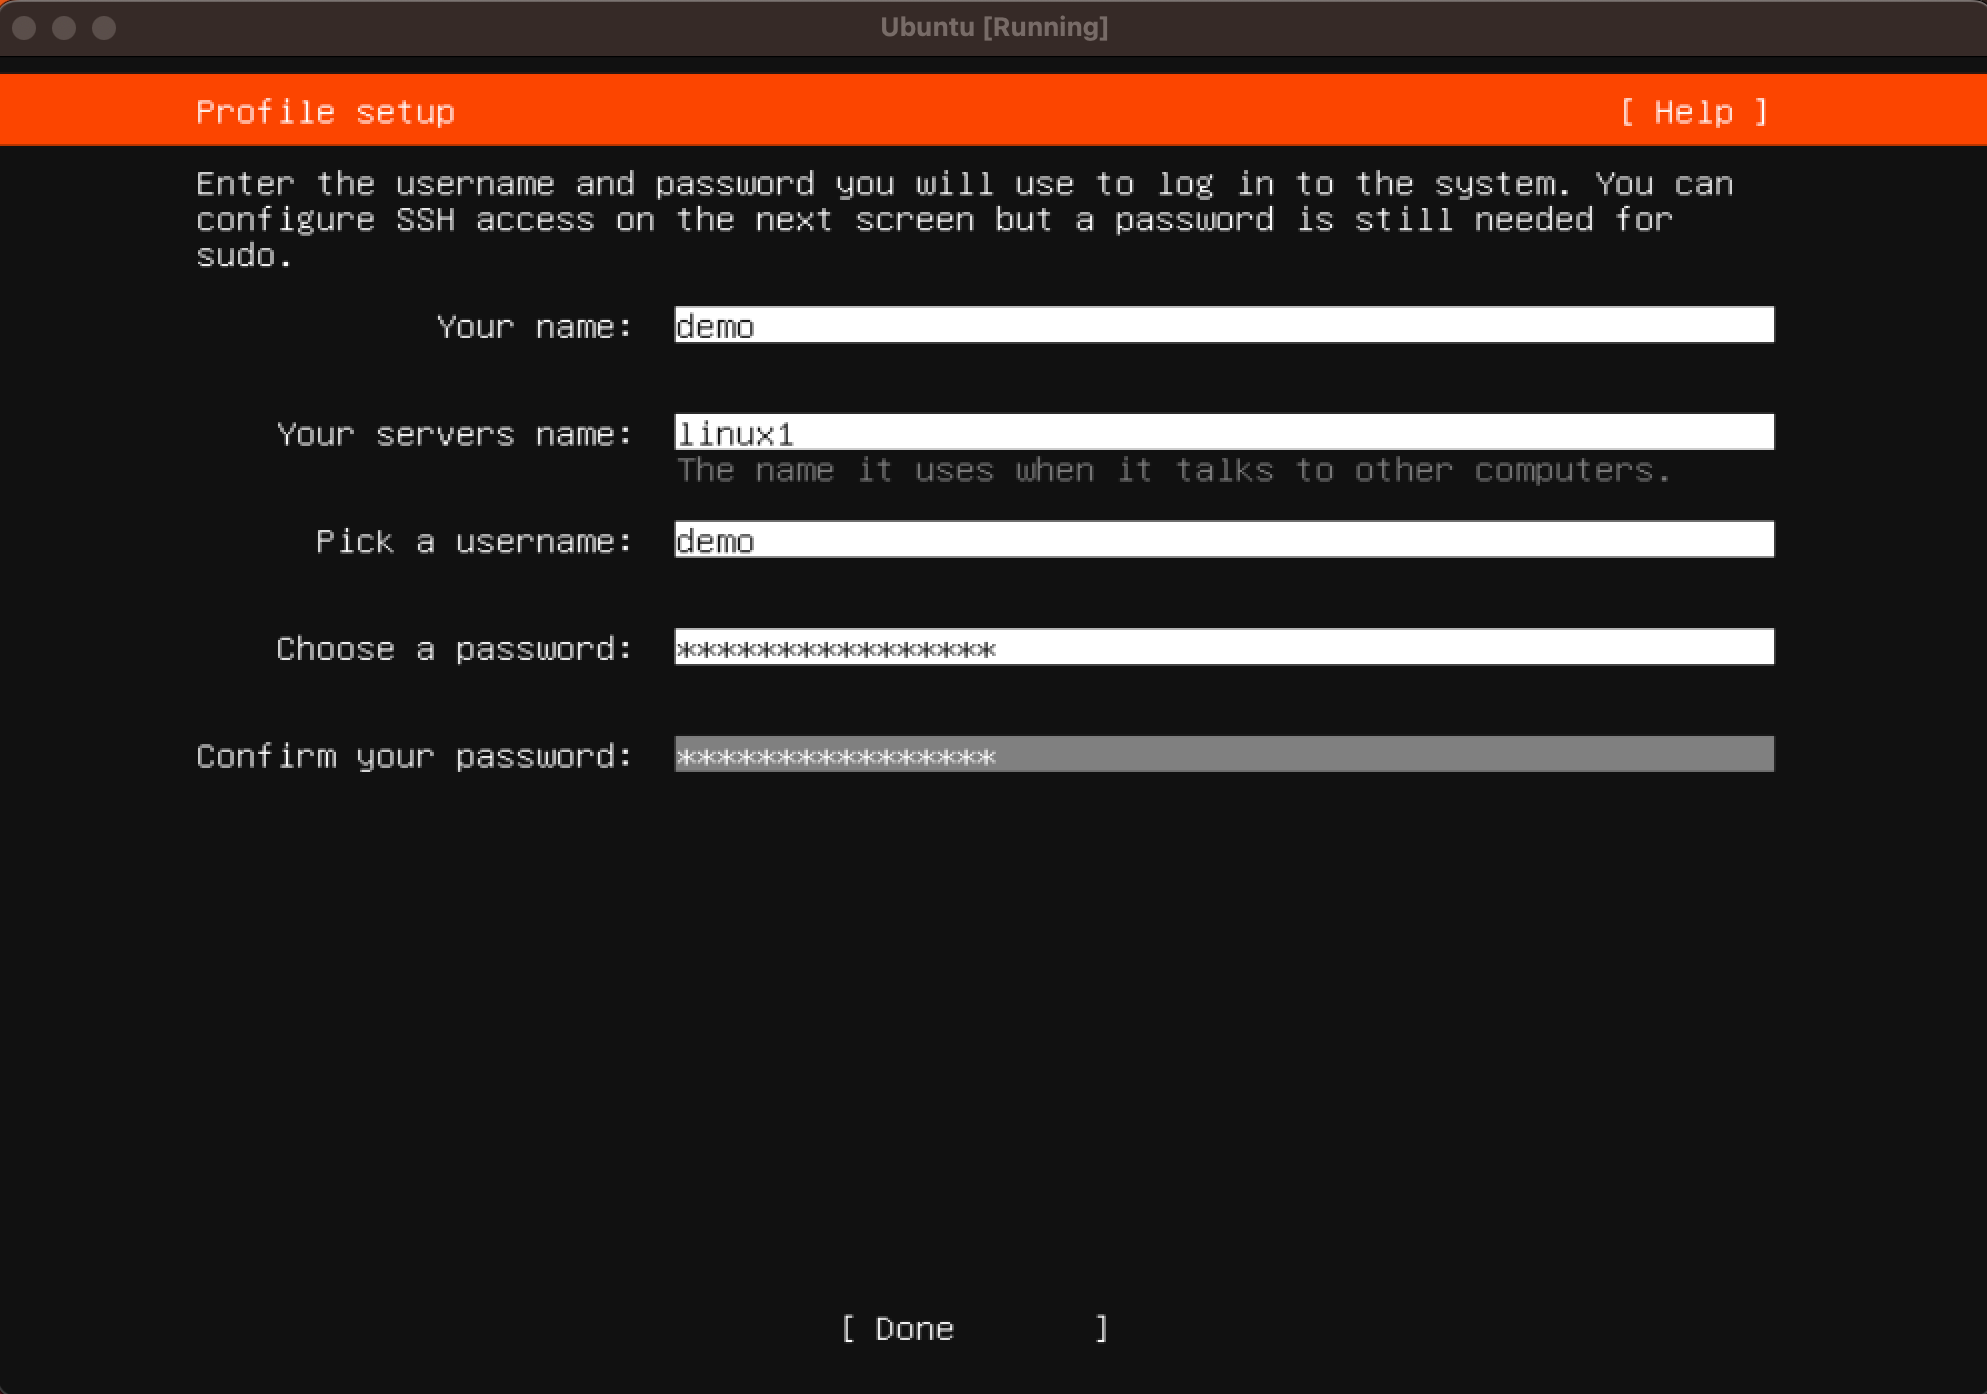
Now on Profile setup, we get to configure our username, hostname, and password. You can choose whatever you want, for this walkthrough I made “Your name” and “username” as “demo”. I made “Your servers name” “linux1”. For password, feel free to make it something memorable - doesn’t have to be overly complicated since this is just a lab VM. When you’re ready, hit Enter on “Done” to finalize. See screenshot for reference.
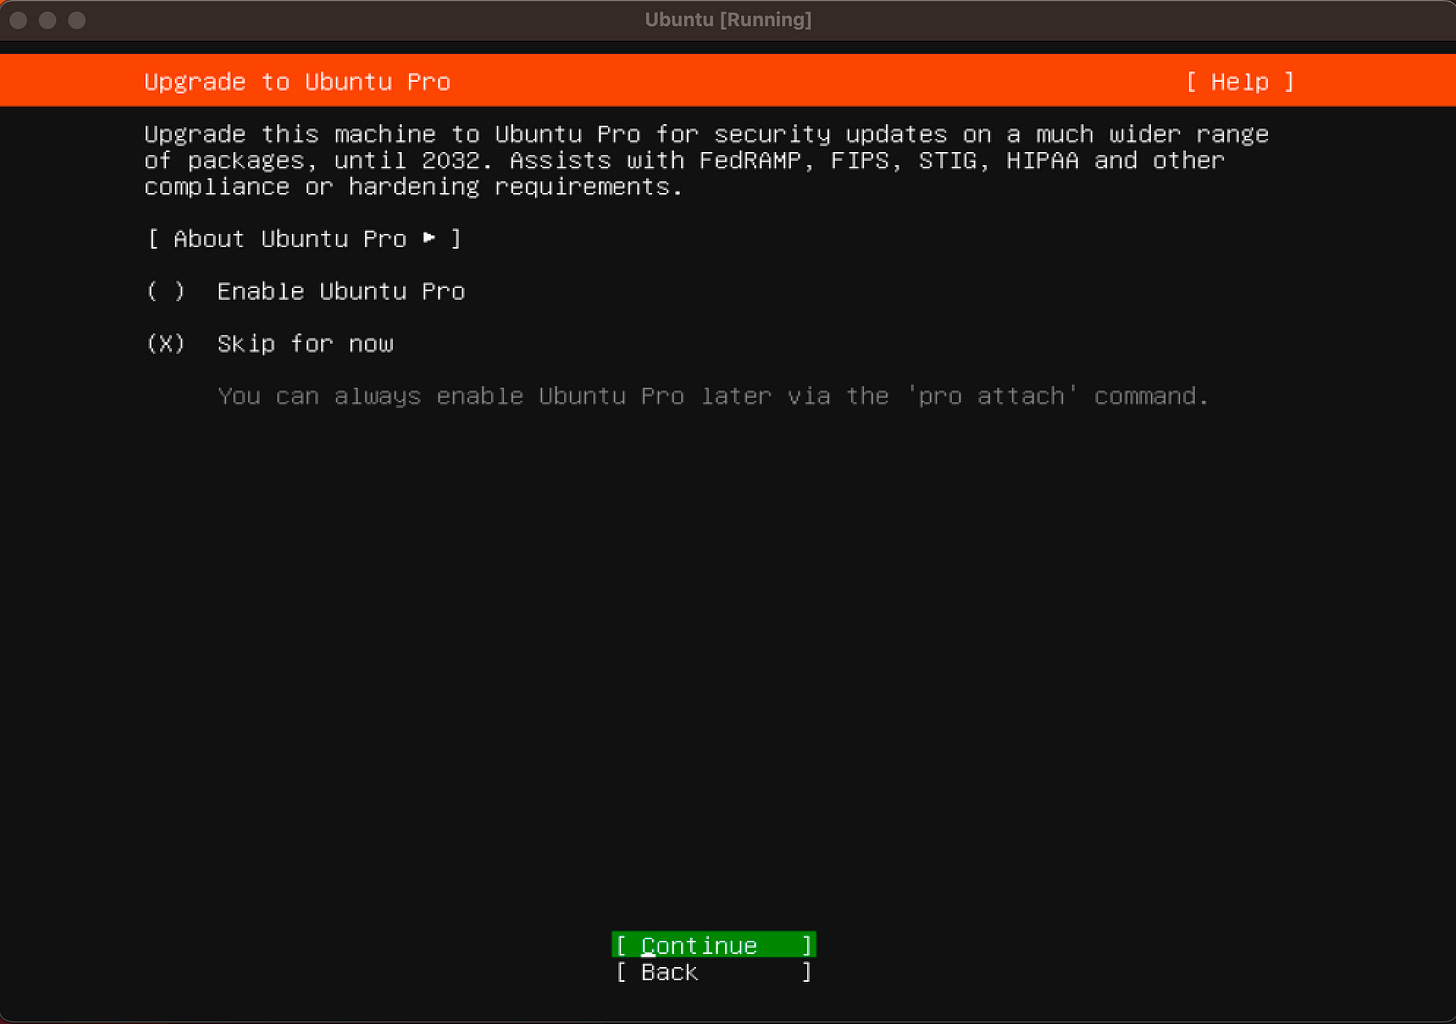
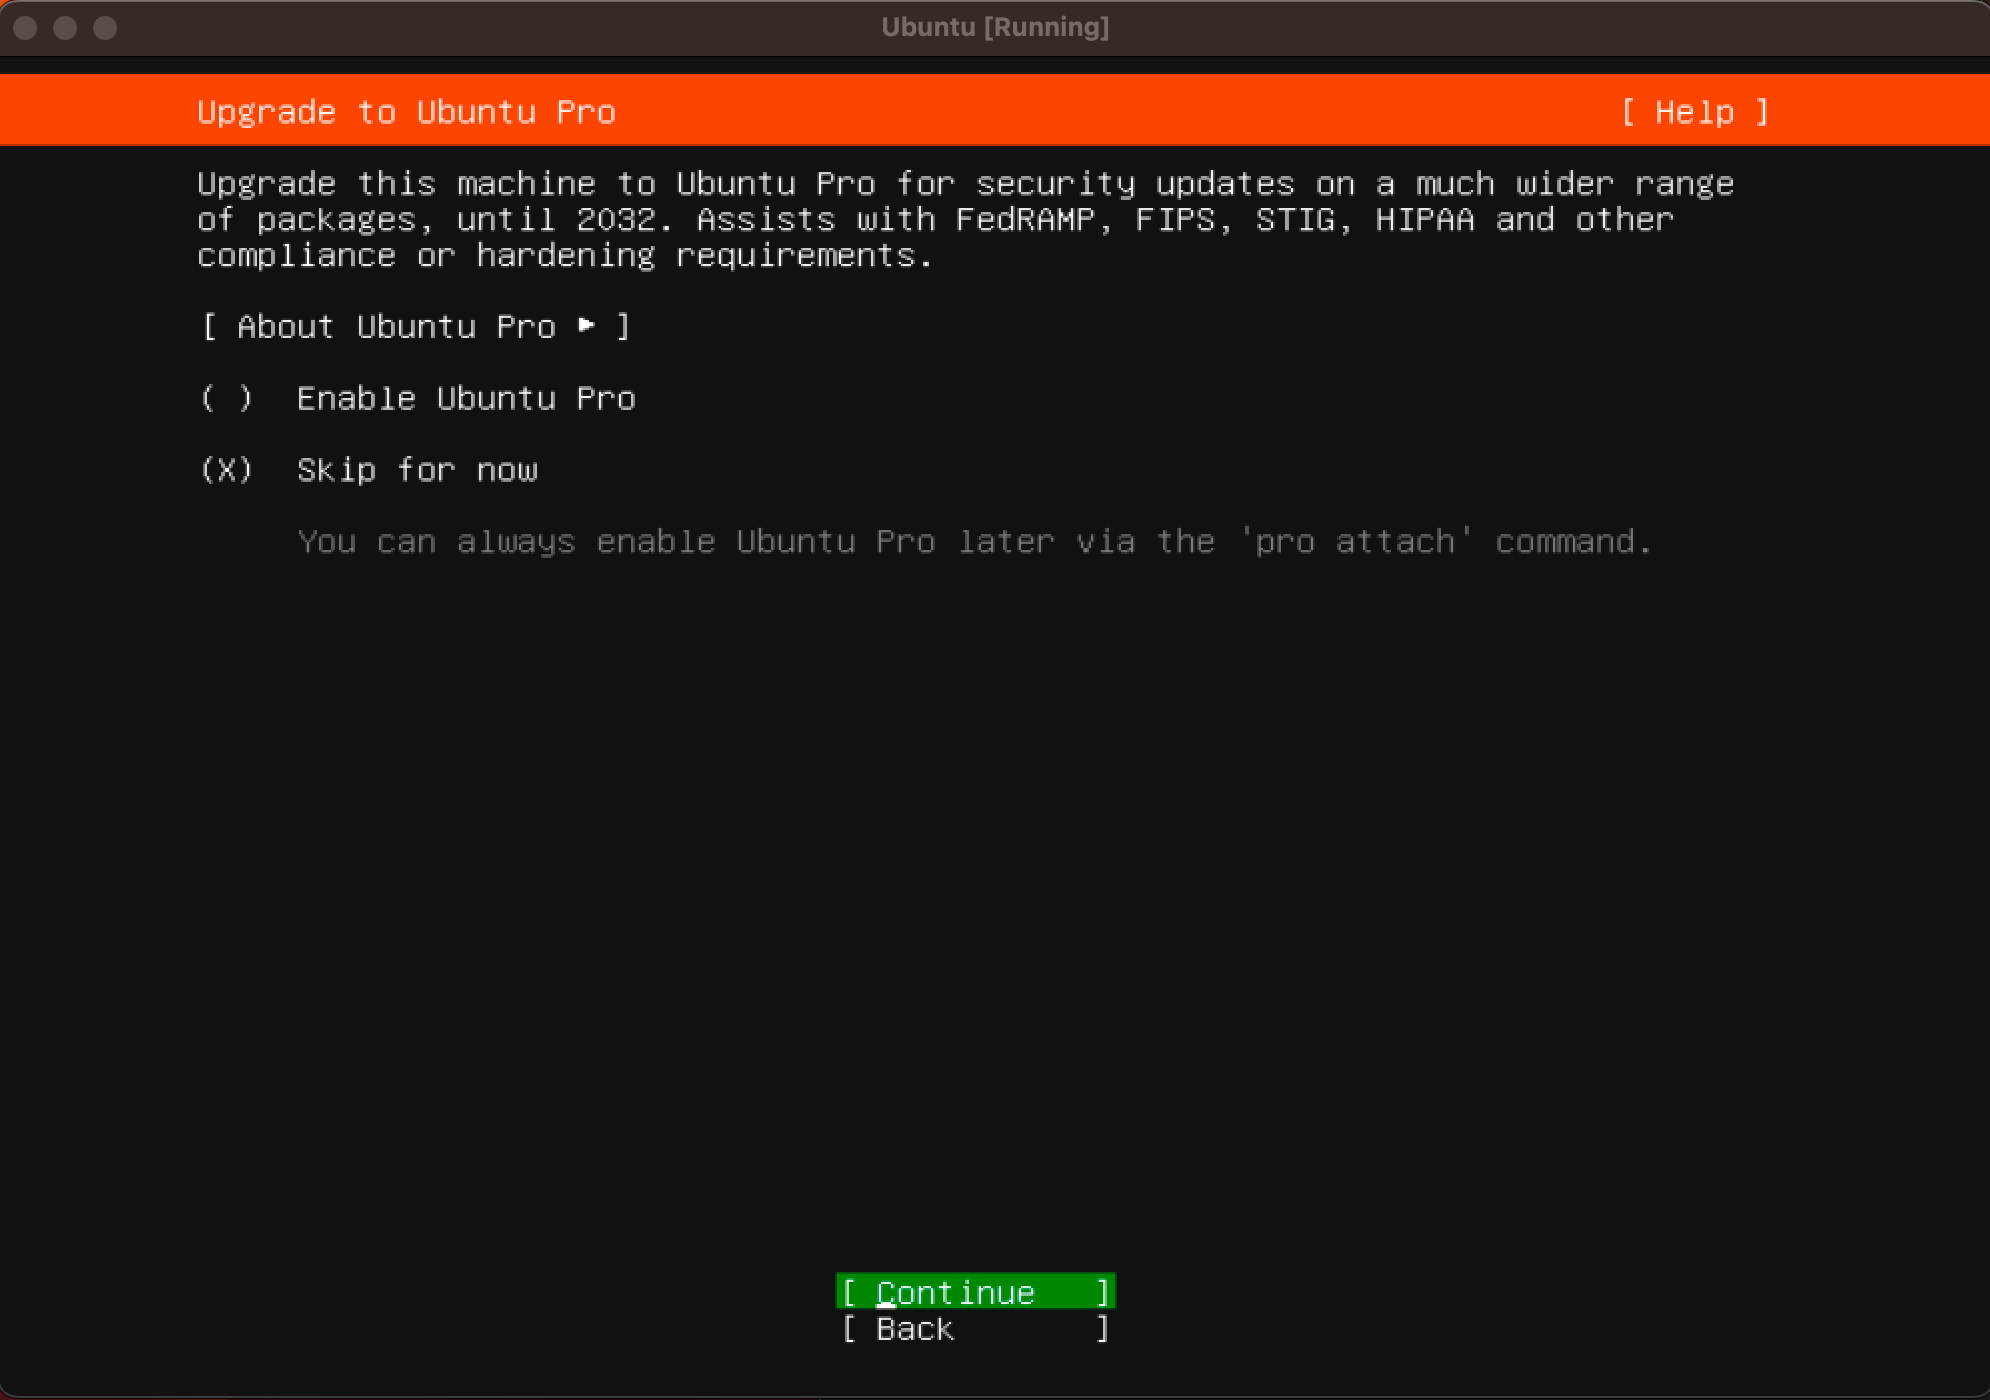
On the Upgrade to Ubuntu Pro page, we want to select “Skip for now” and hit Enter on “Continue”.
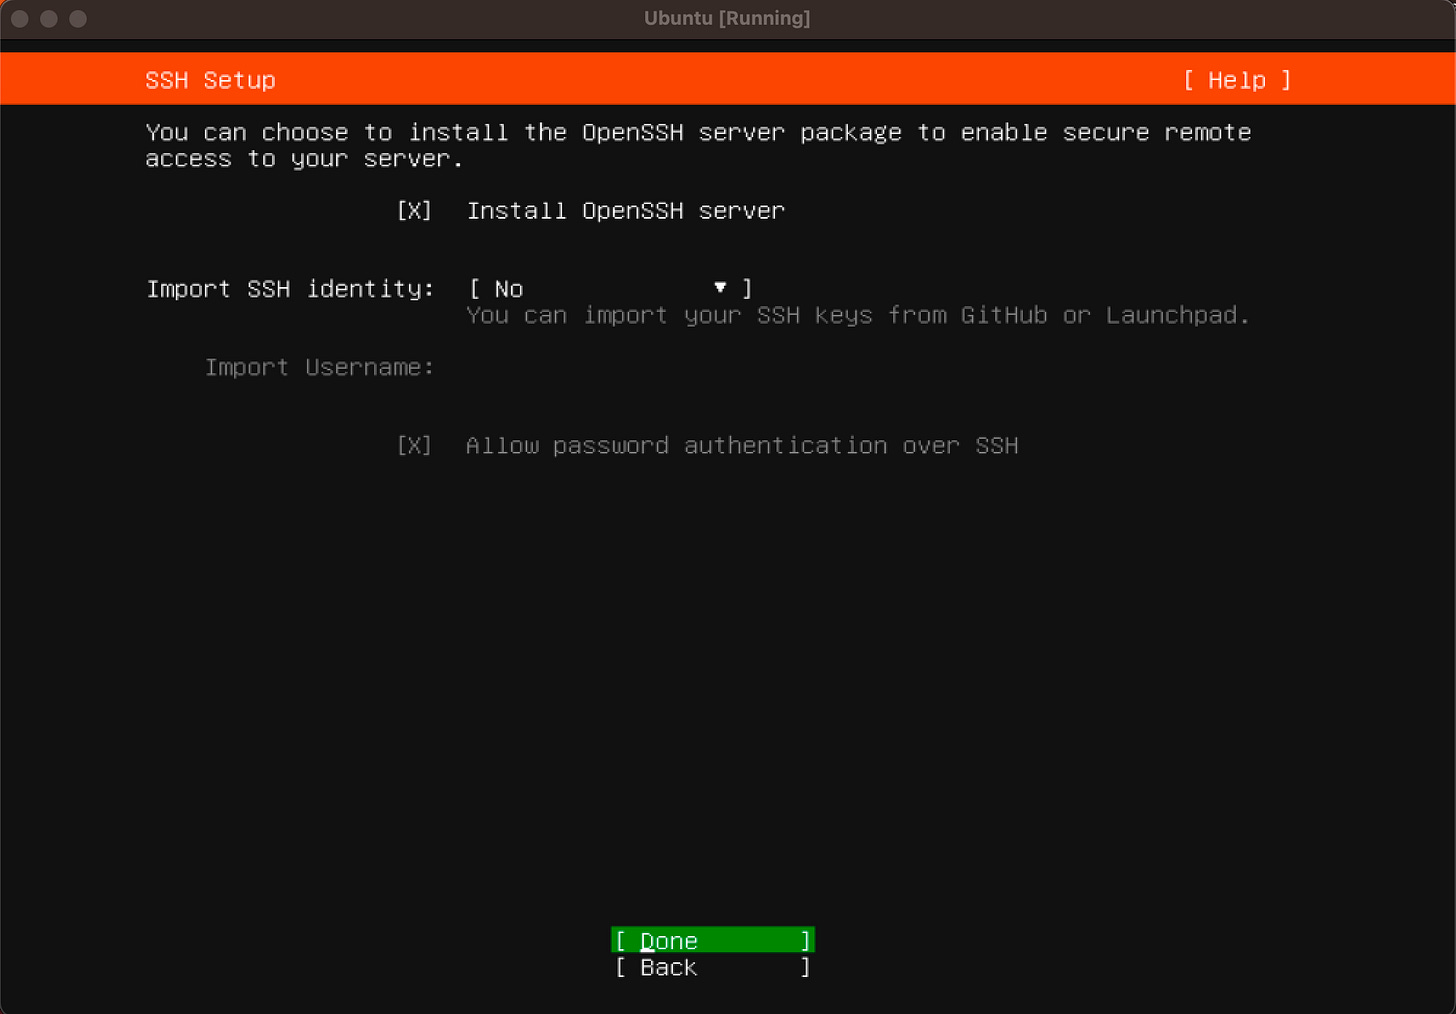
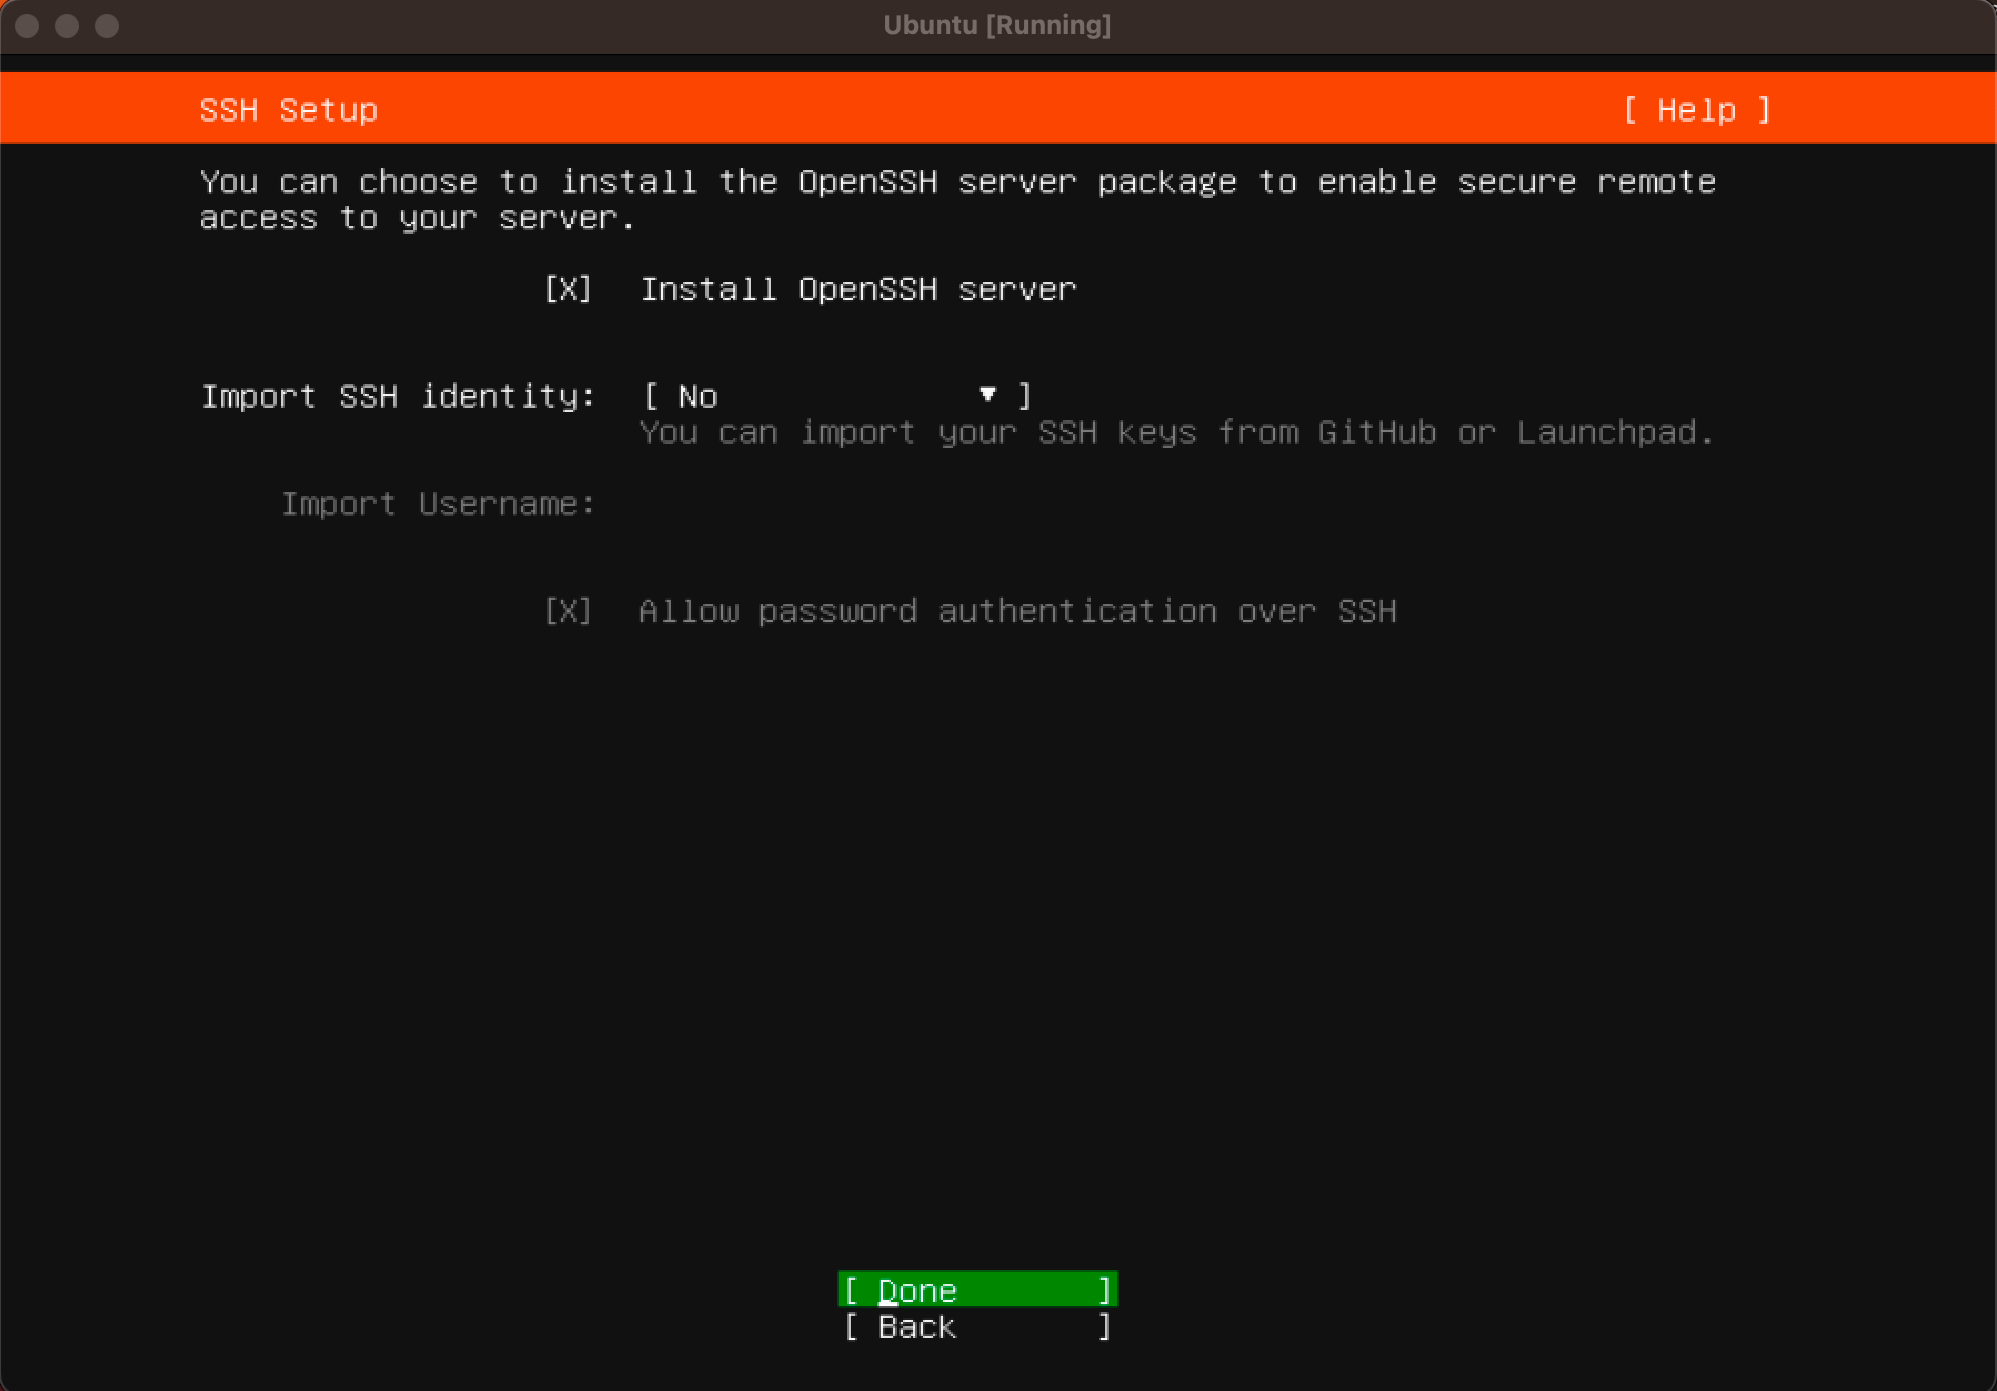
On the SSH Setup page we want to select “Install OpenSSH server” and then hit Enter on “Done”.
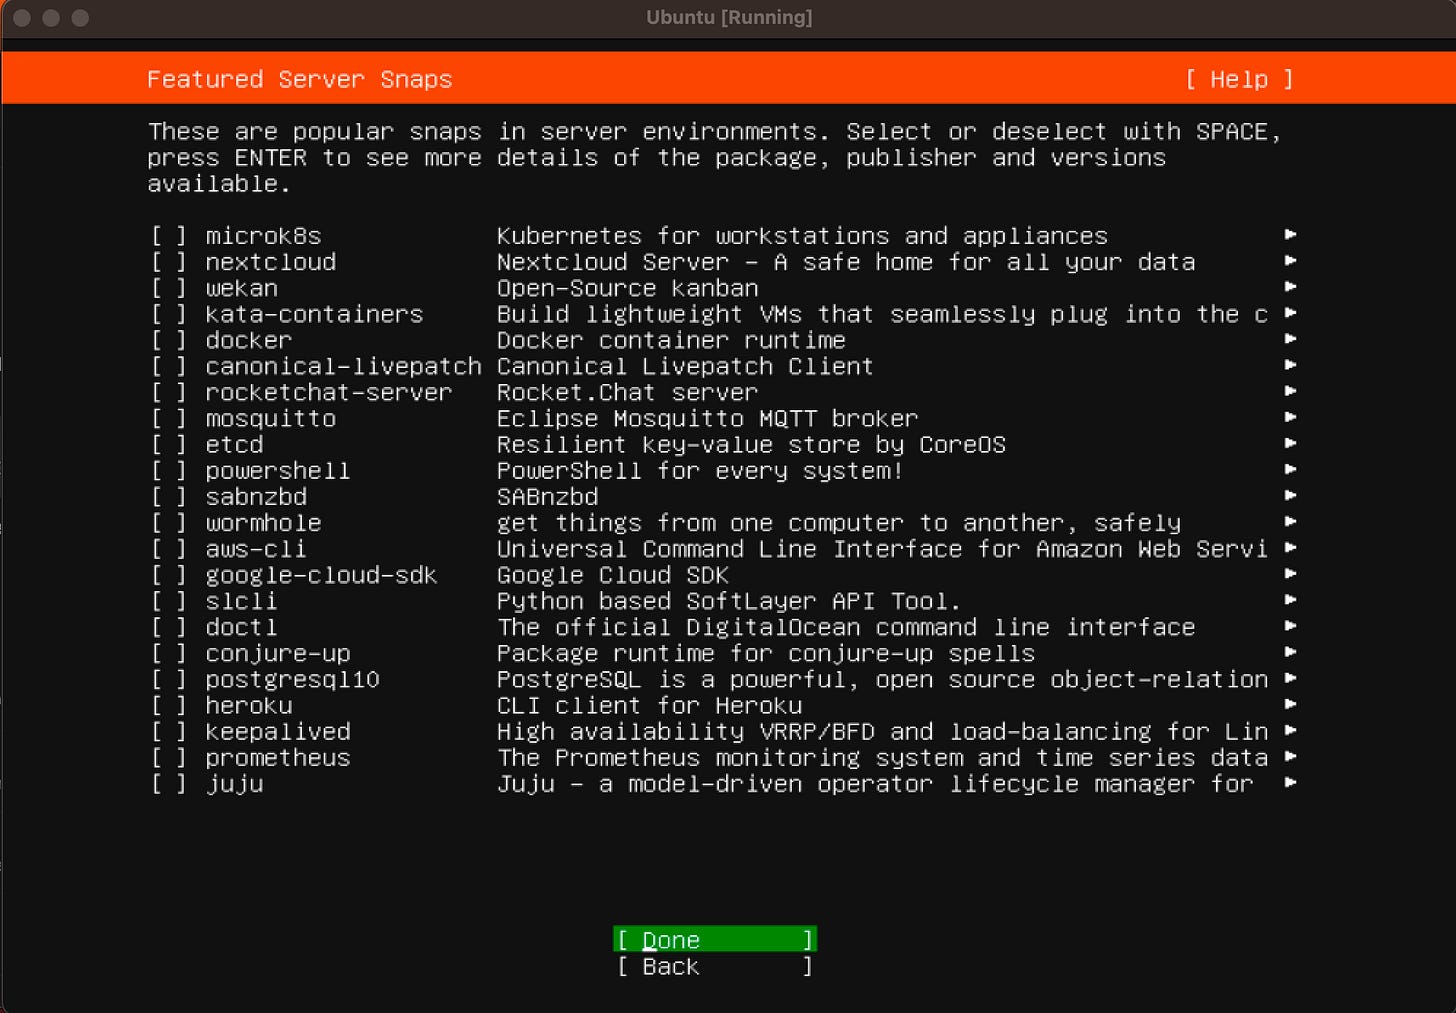
On the Featured Server Snaps page, we can just leave them all unselected and then hit Enter on “Done”.
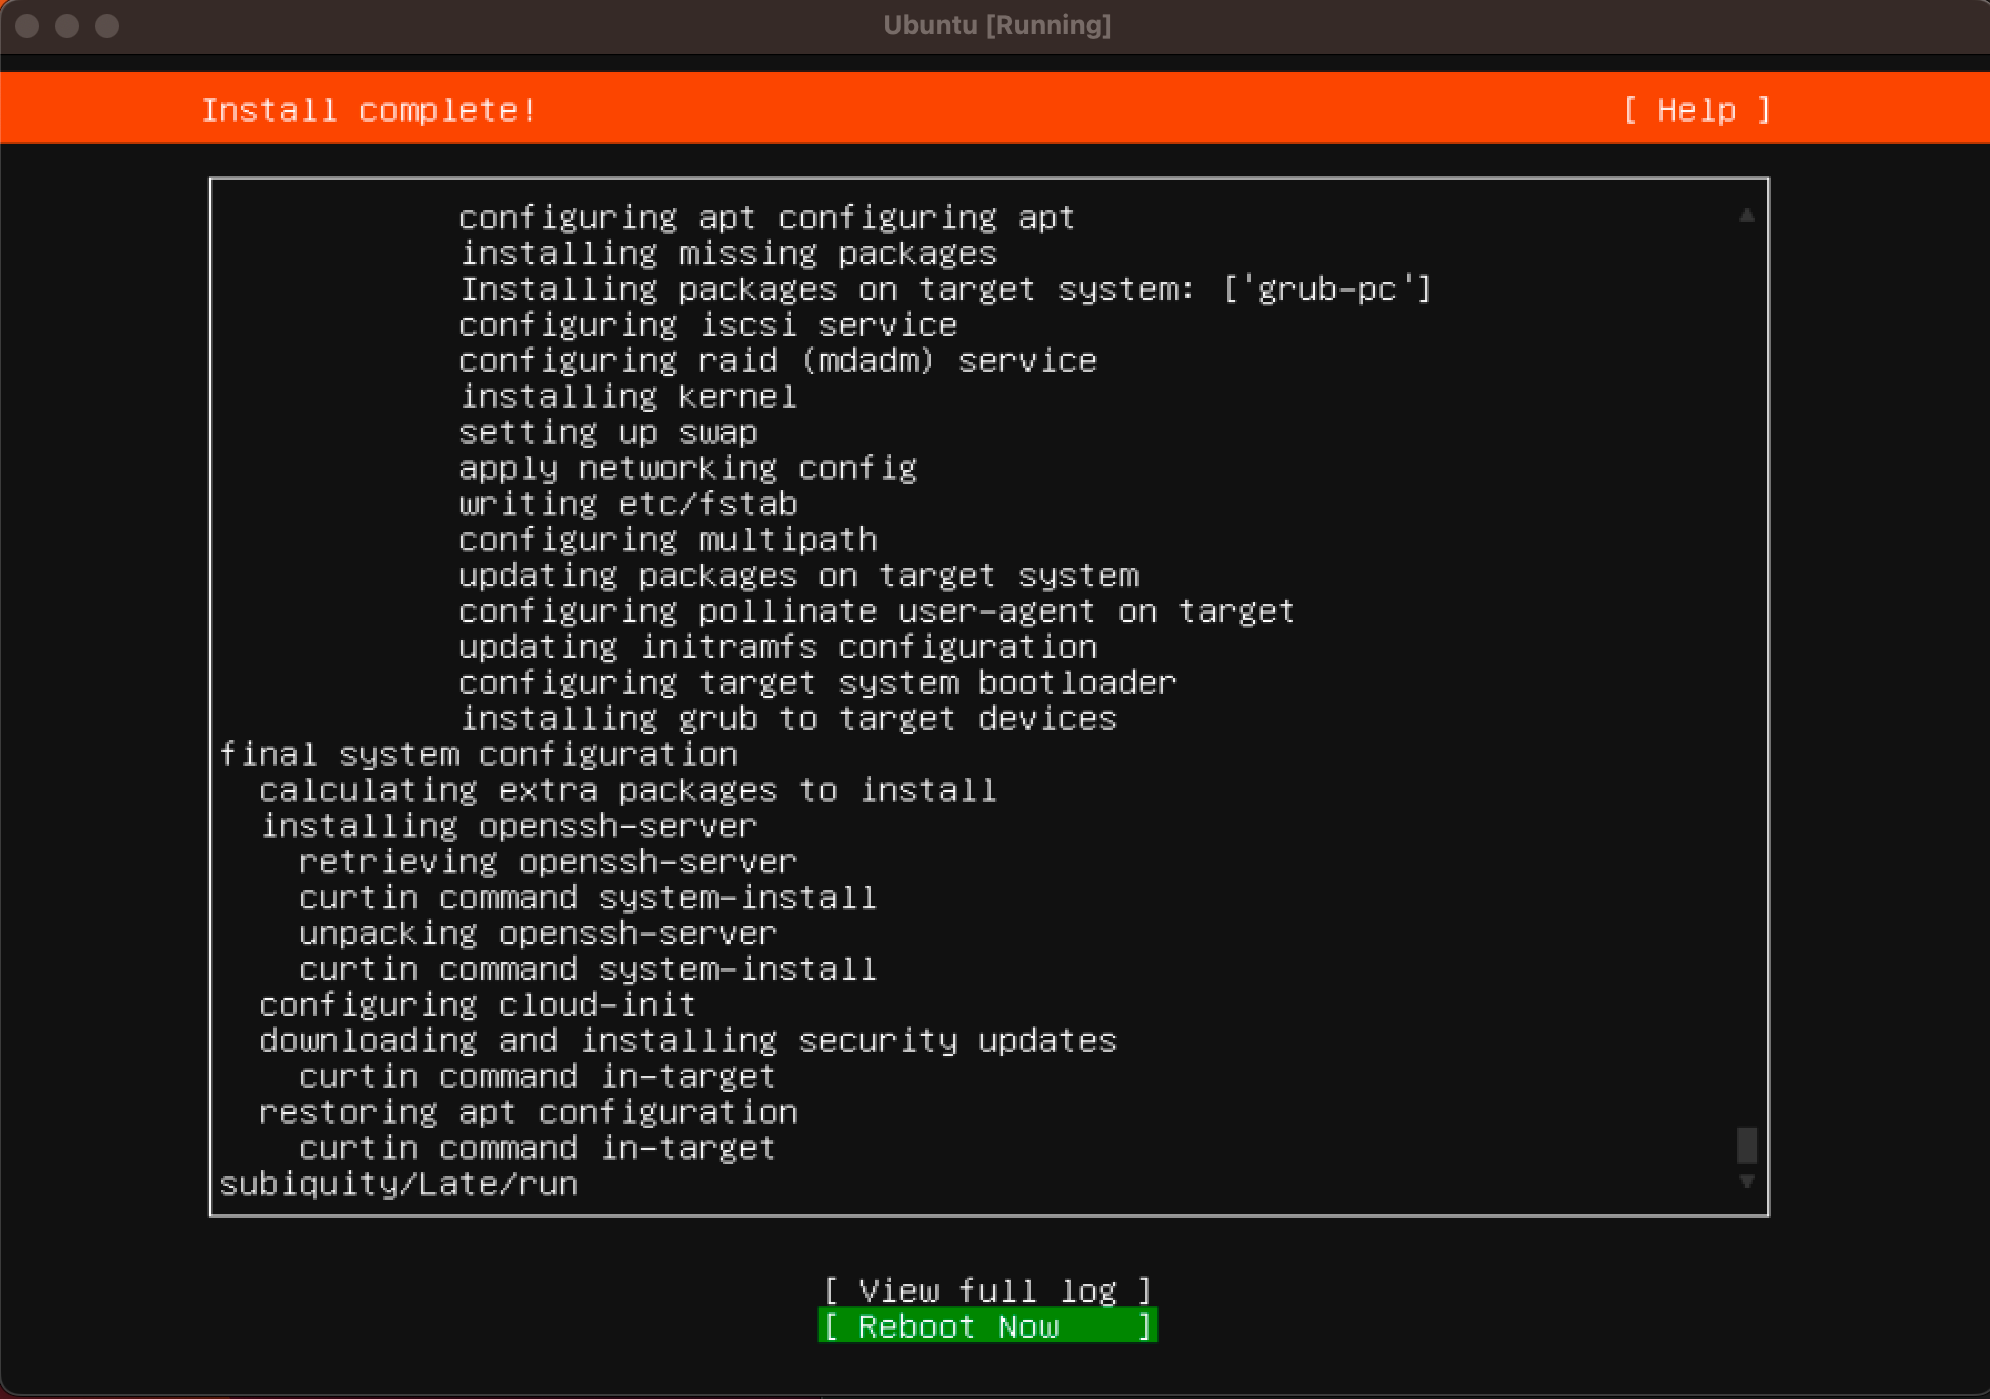
That should conclude the settings portion and it will continue to finish the install. After a minute or so, we should see a message on the orange banner saying “Install complete”. Once the “Reboot Now” option shows up at the bottom, select it and hit Enter.

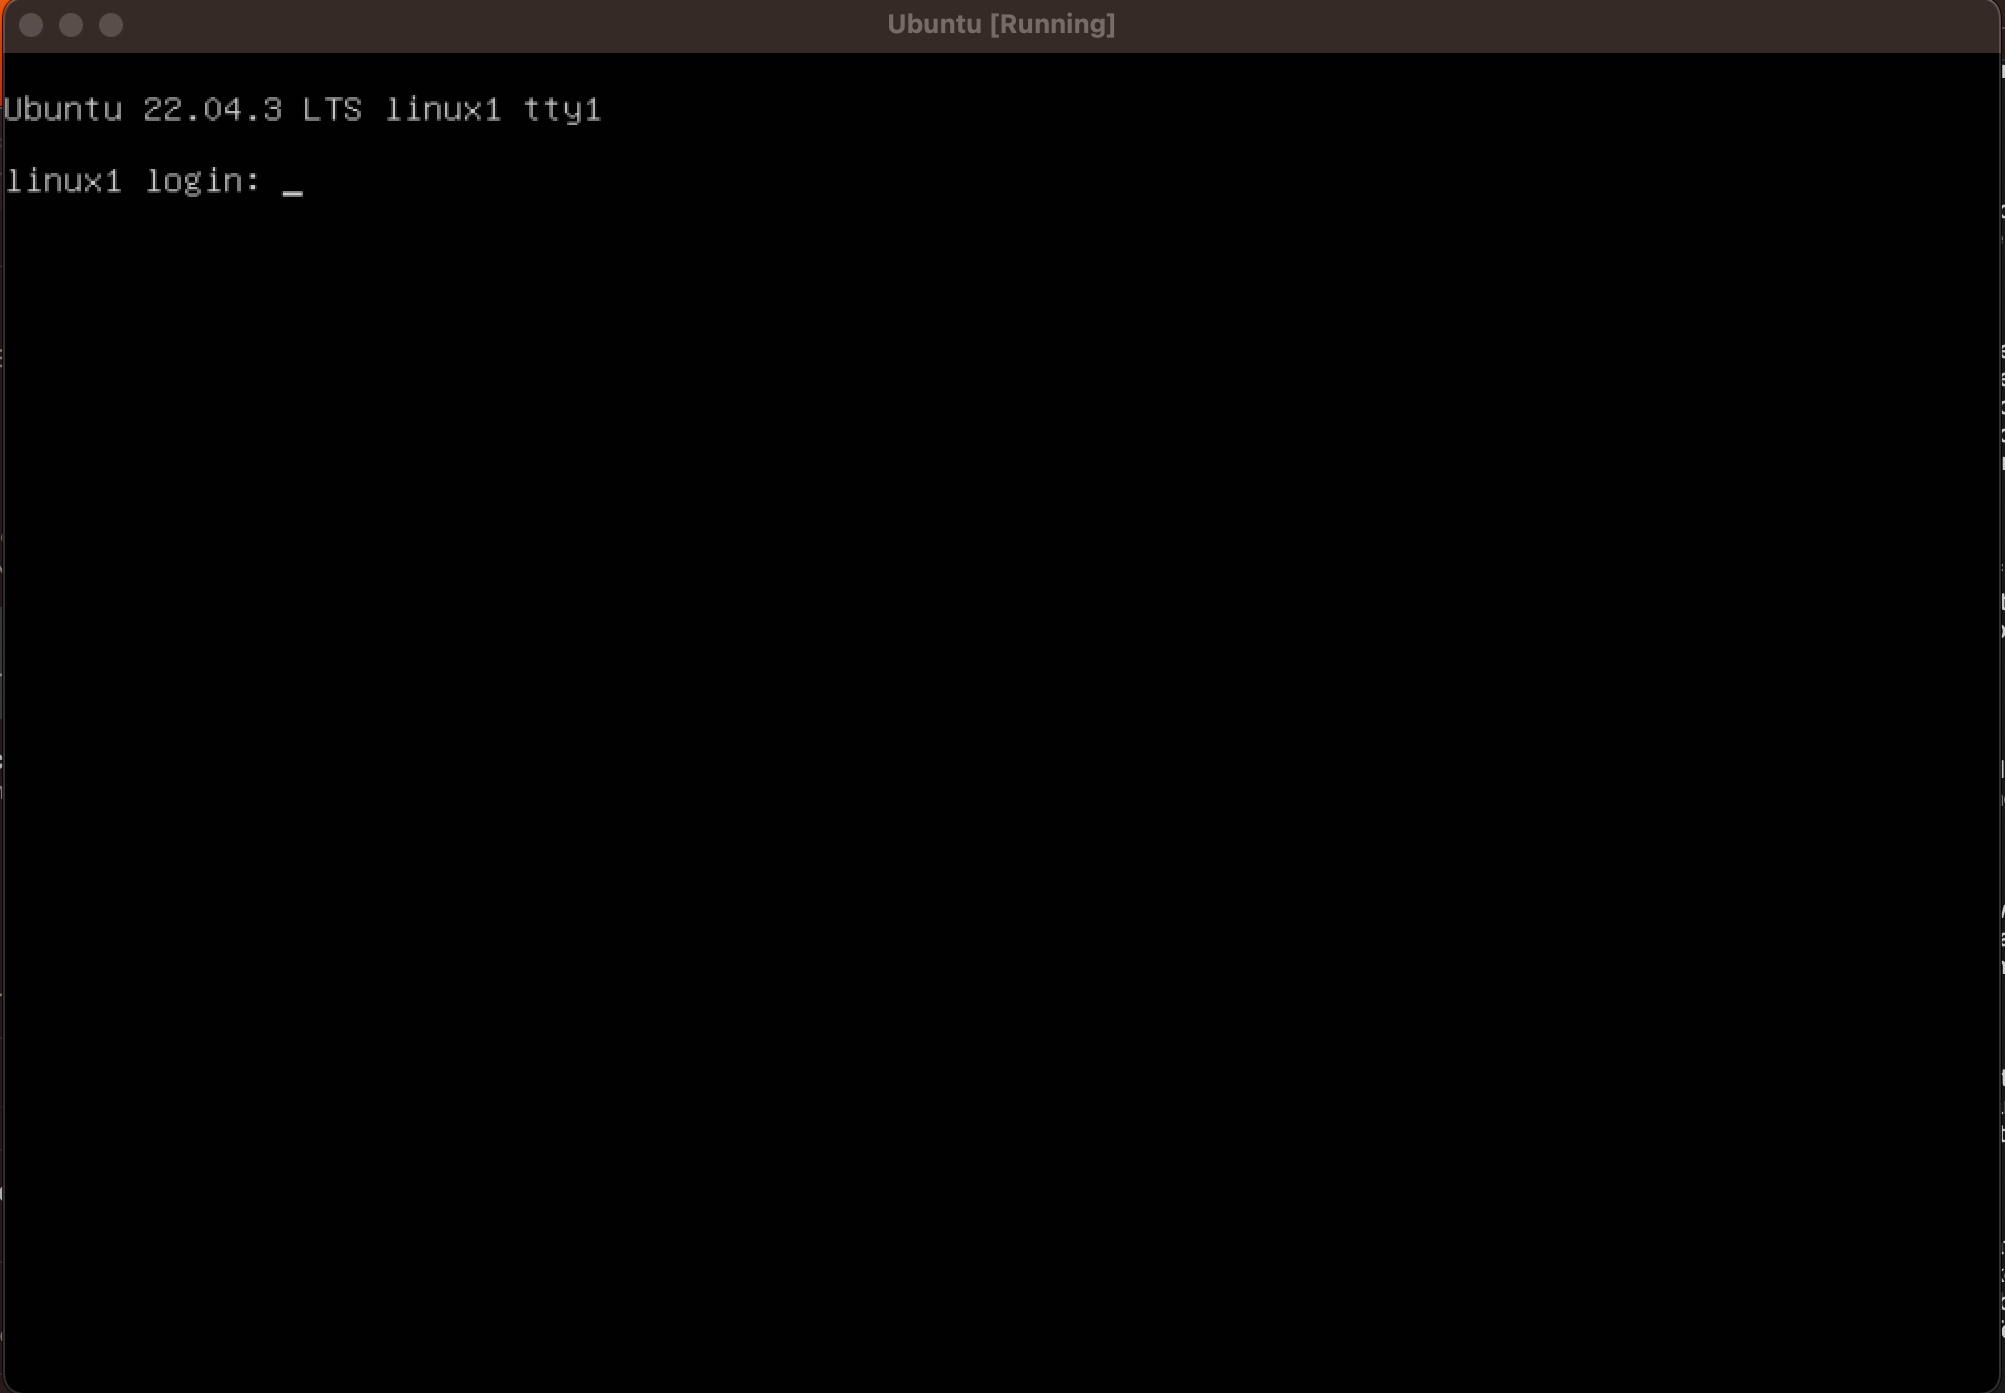
If you receive an error message that says to remove the CD and hit Enter to try again - try just clicking inside the VM and hitting Enter, it should proceed to boot up successfully (otherwise you’ll probably have to power off the VM, remove the .iso from the CD Drive, and start the VM back up). You’ll know the installation was successful once you get a login screen like this:

Login with the username/password that you entered in step 12.


The Ubuntu OS is now installed! Let’s get to the commands.
Getting Started with the Linux CLI
First things first, let’s see if there are any new updates to get installed. We will be using the apt-get command line utility - this utility is used to check for software updates, install software, etc. We use sudo in front of the commands to run them as a privileged user (similar to Run-As Administrator).
sudo apt-get update

sudo apt-get upgrade
The first command might not return much info. The second command might ask if you want to continue with the update [Y/n], we’ll want to type “Y” and hit Enter.
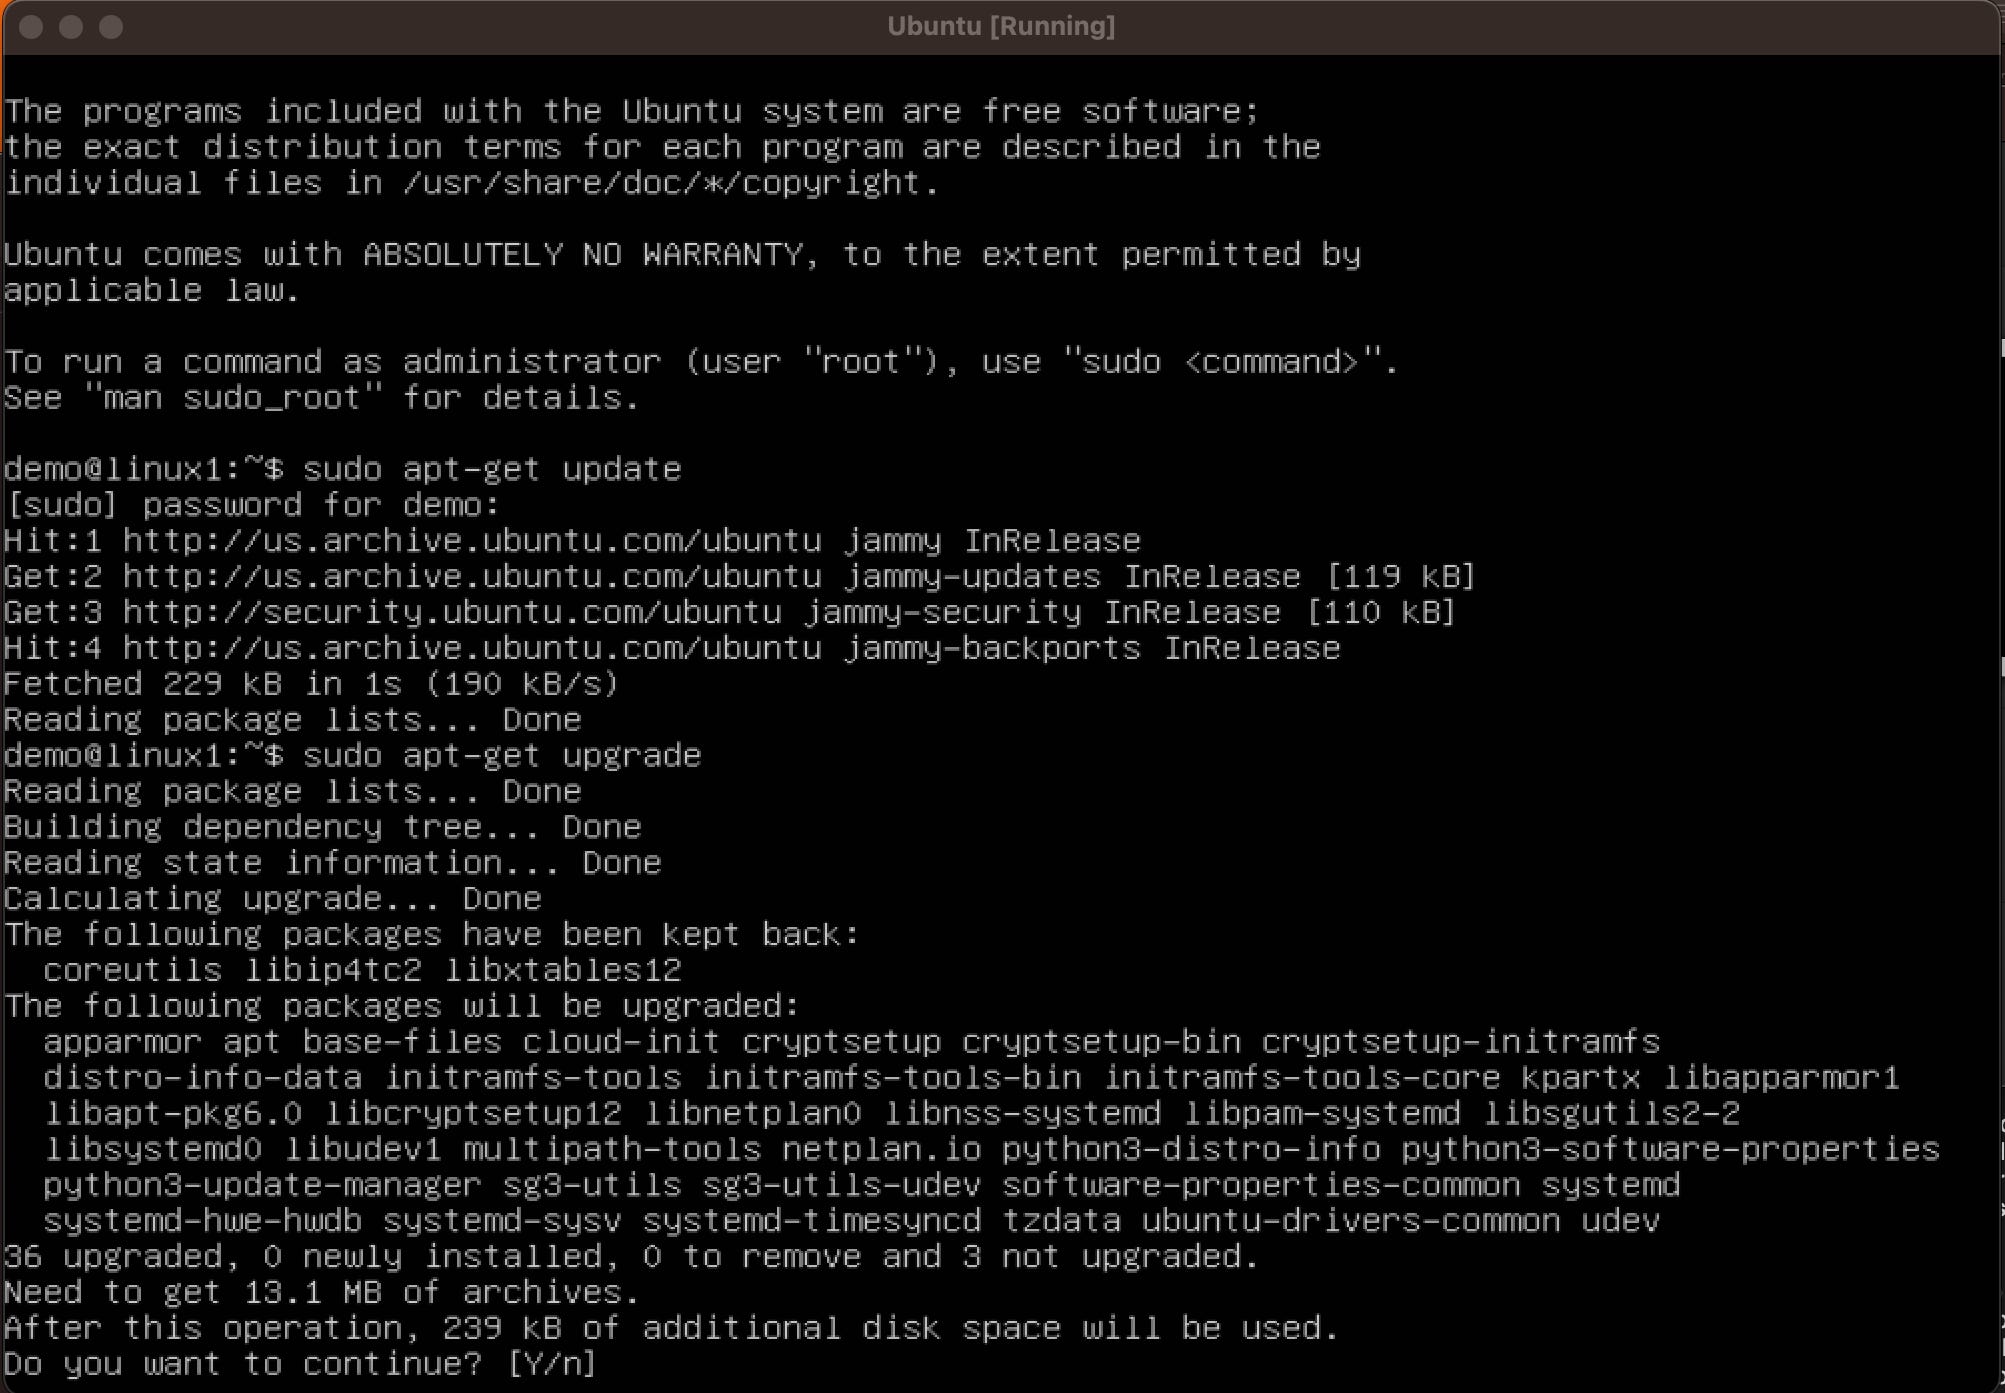
It may take a minute or two to complete the updates. If it asks which services should be restarted, just type “1-9” to choose all of them.

Next, let’s run through some commands to find out more information about our system. Let’s give a cybersecurity scenario: you are an incident responder tasked with completing a basic “sweep” of this server. You have been asked to gather the IP Address information, running processes, and file system usage all inside of a file. You need to create a directory (similar to folder) named “sweep” located at /tmp for the file to placed within. Note: Anything after a “#” is considered a comment - I added these for brief explanations of what the command is doing.
#Get oriented with the current working directory
pwd

#Change directory to /tmp
cd /tmp

#Make the new directory named "sweep"
mkdir sweep

#List the contents of the /tmp directory to make sure sweep exists
ls /tmp

#Change directory to the newly created directory
cd sweep

#Get the IP Address info & send the output to the sweep_results file
sudo ip address > sweep_results

#Get the running processes & append the output to the sweep_results file
sudo ps -aux >> sweep_results

#Get the file system usage in human readable format and append the #output to the sweep_results file
sudo df -h >> sweep_results

#List the contents of the current "sweep" directory to ensure the #"sweep_results" file exists
ls

#Read the contents of the file
cat sweep_results

#To read through the contents of the file 1 page at a time, use 'more'
more sweep_results

#To search the sweep_results file and see if the ssh process was running #on the system
grep "sshd" sweep_results

#To search the sweep_results file and see the IP Addresses
grep "inet" sweep_results
Next, let’s learn some more commands to interact with files + learn some basic scripting. Part 2 of scenario: you now want to complete the same task but this time have it scripted out. Scripts are often used to automate tedious tasks, in our case, we will have the script carry out each command upon execution
In order to write the script, we will need a text editor (think notepad). There are different text editors available - for simplicity’s sake we will be using nano.
#We need to install the nano text editor
sudo apt-get install nano

#Start writing the script with nano - file is named sweep_script
nano sweep_script
As this will be a bash script, the first line needs to be:
#!/bin/bashThe remainder of the script will be the same commands we used before:
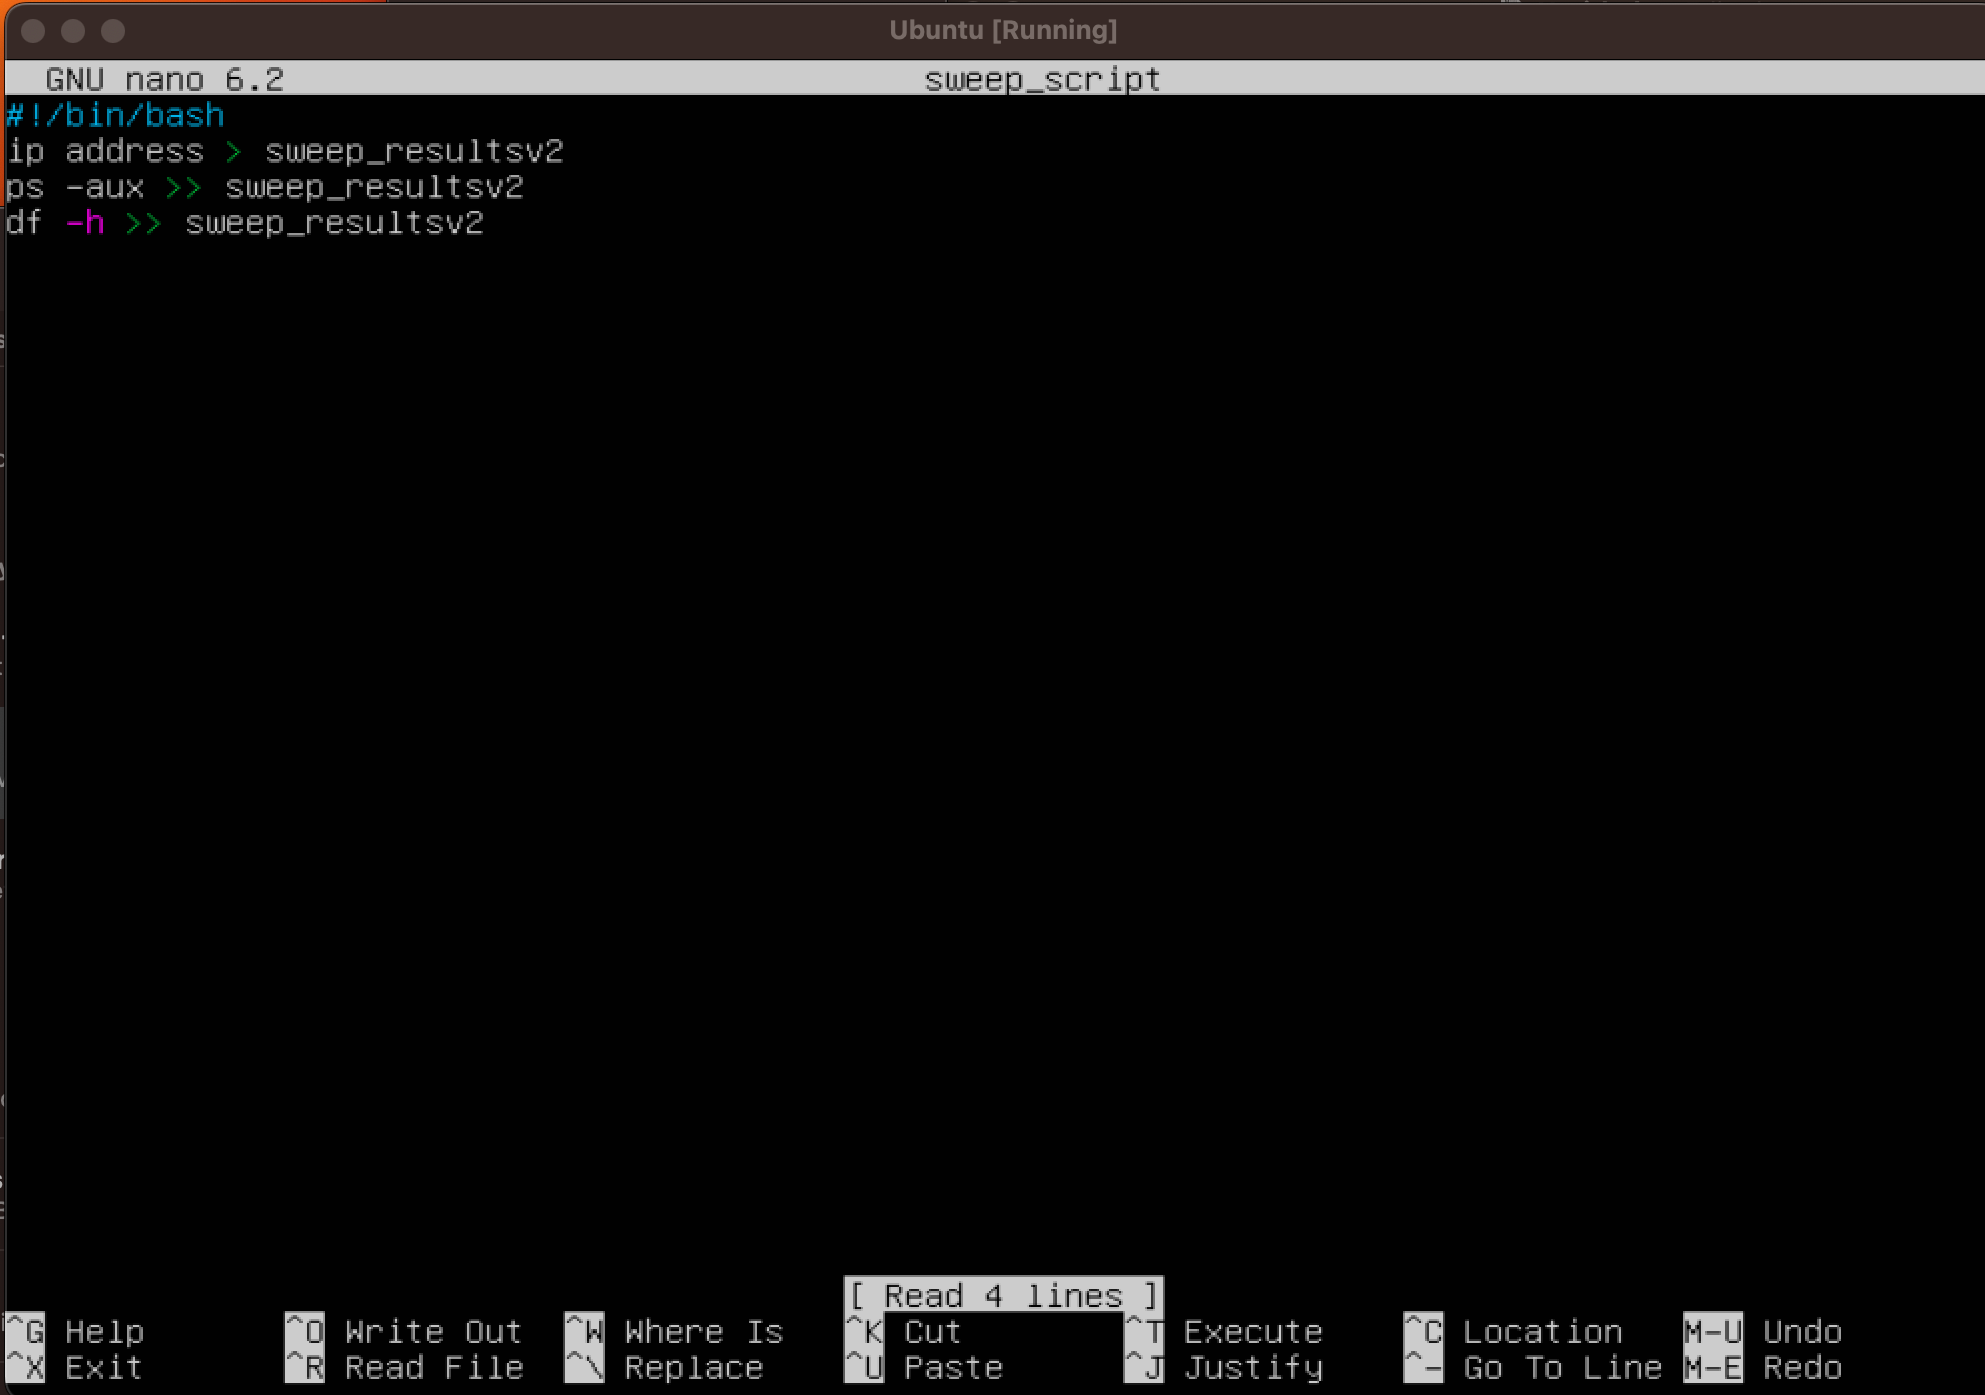
#!/bin/bash
ip address > sweep_resultsv2
ps -aux >> sweep_resultsv2
df -h >> sweep_resultsv2
Your script file should look like this:
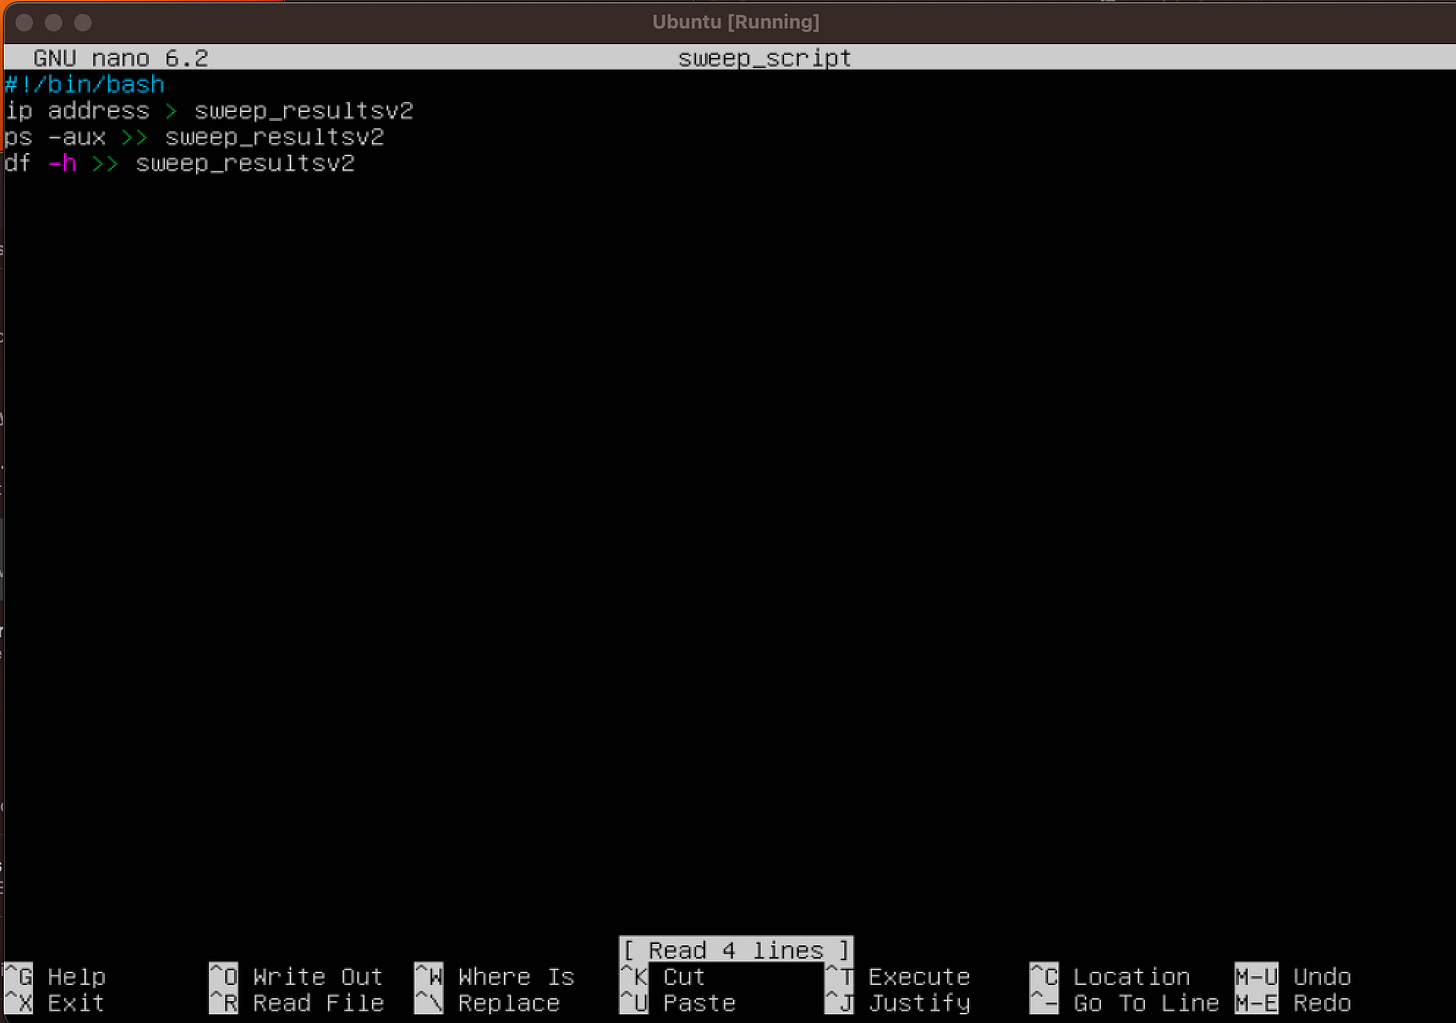
Once it looks good, enter these 2 keys at the same time to exit the file: Ctrl+x.
Enter “y” to save the file.
Now that we have the script written, we need to make it executable.
#To view the current file permissions of the script
ls -l sweep_script

#To add the executable bit (make the script executable)
chmod +x sweep_script

#View the current file permissions again to see the difference
ls -l sweep_script
Finally, we are able to execute the script and check the results
#To run the script
sudo ./sweep_script

#List the contents of the current directory to view the new results file
ls

#Read the new results file
cat sweep_resultsv2
We successfully ran our script!
Lastly, let’s learn how to copy, move, and delete files. Part 3 of the scenario: now you want to make a copy of the script “sweep_script” and move it under your home directory. You also want to delete the old results files “sweep_results” and “sweep_resultsv2”.
#Create a copy of the script and name it "sweeper_v1"
cp sweep_script sweeper_v1

#List contents of the current directory to see the new file
ls

#Create a new directory under your home directory named "scripts"
mkdir ~/scripts

#Move the copy "sweeper_v1" to the new "scripts" directory
mv sweeper_v1 ~/scripts

#Change directory to the "scripts" directory
cd ~/scripts

#List the contents of the "scripts" directory to see the file we moved.
ls

#List the contents of the /tmp/sweep directory to see the files we want #deleted.
ls /tmp/sweep

#Delete every file under /tmp/sweep that starts with "sweep_r"
rm -f /tmp/sweep/sweep_r*

#List the contents again to see that the files were deleted
ls /tmp/sweep
Closing
Hopefully walking through this process was able to get you a little more comfortable with Linux (and Virtual Machines!). As in all areas of IT/Cybersecurity, there is always plenty more to learn! Feel free to leave a comment if you have any questions or run into any problems; I’m happy to help!
I’ll be back next week to continue the Ransomware Series.
Hi this was a great walkthrough. Looking forward to whats next. Thanks for doing this.
Great walk through 🙌